Biscoff Brownies
This post may contain affiliate links. See my disclosure policy.
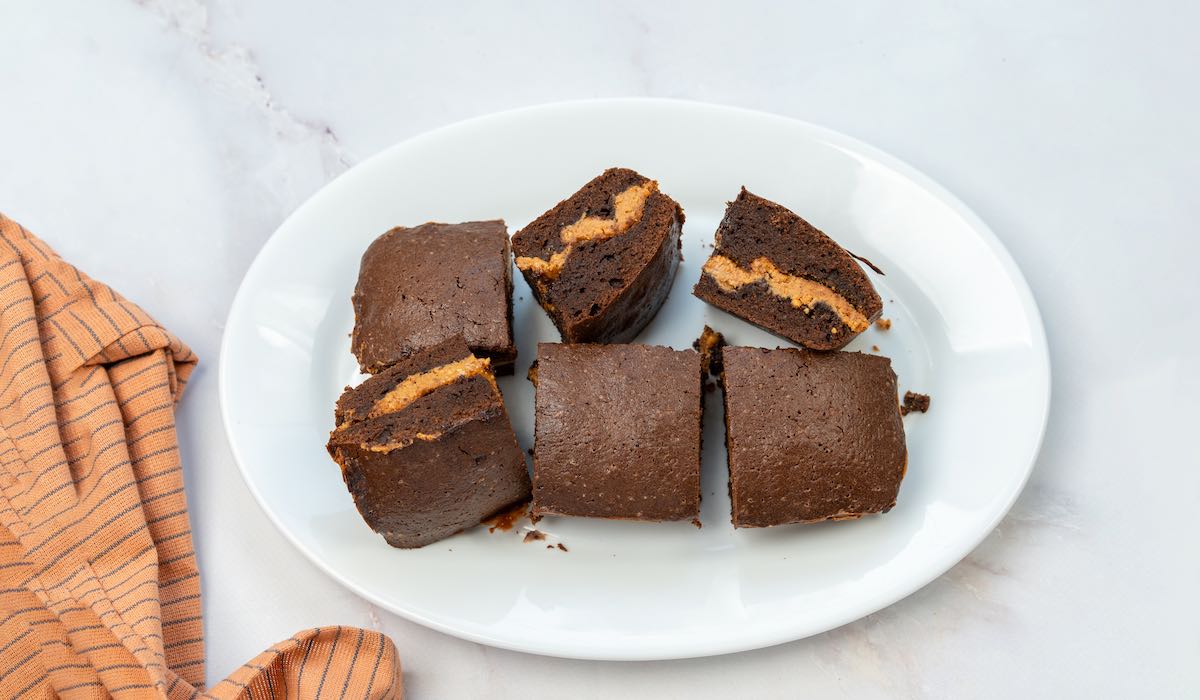
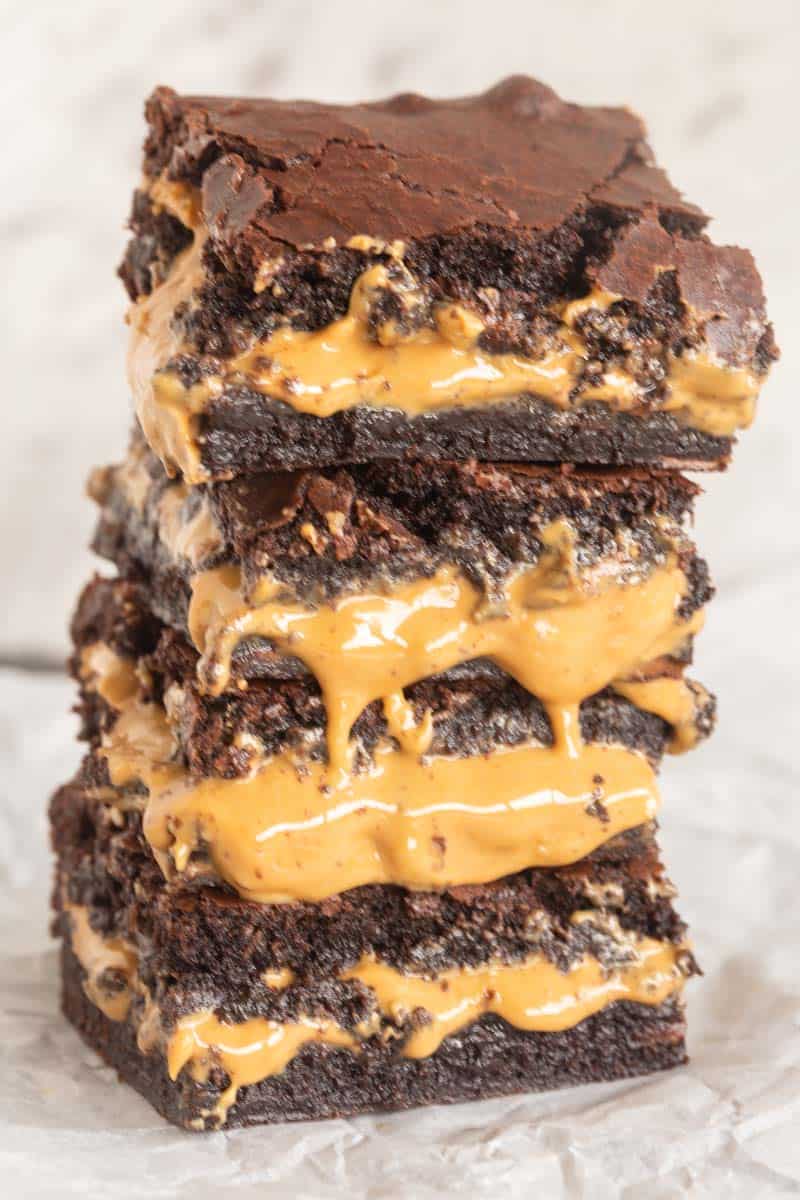
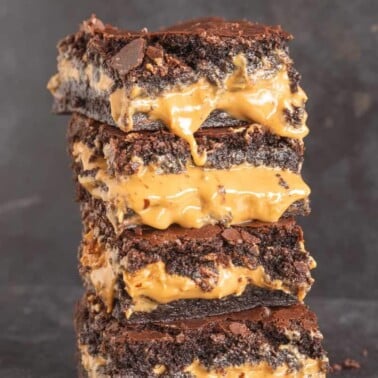
It doesn’t get better than these Biscoff brownies. They’re thick, chewy, and filled with a thick layer of Biscoff in the center. Made with simple ingredients, NO eggs are needed.

I love Biscoff, and I could eat it every day if my waistline allowed it. Lately, I’ve been experimenting with pairing Biscoff with perhaps my favorite dessert ever: brownies.
With crackly tops, fudgy chocolate, and a creamy layer of Biscoff in the middle, it’s the ultimate combination for satisfying your chocolate cravings.
When testing this recipe, I experimented with both dark and milk chocolate bases, as well as swirling Biscoff on top of the brownies, in between them, or just using it as a frosting. I found that adding a thick layer in the middle ensured rich and creamy Biscoff goodness in every bite… without drying out!
Table of Contents
Why I love these biscoff brownies

- Simple ingredients. Aside from the Biscoff spread, no unusual or niche ingredients are required. Just simple baking staples.
- Perfect texture. Crisp on the outside and melt-in-your-mouth gooey in the center.
- Ridiculously impressive. No one will see these bad boys coming. You’ll have the most memorable dessert in the room!
- Easily made vegan. Yes, even Biscoff spread is vegan-friendly, so everyone can enjoy these brownies!
What readers are saying
★★★★★ – “I’m pretty good at stuffing things up, but this recipe turned out perfectly. Cheers!” Daks
★★★★★ – “I made these for my son’s 5th birthday and everyone raved over them.” Kylie
Key Ingredients
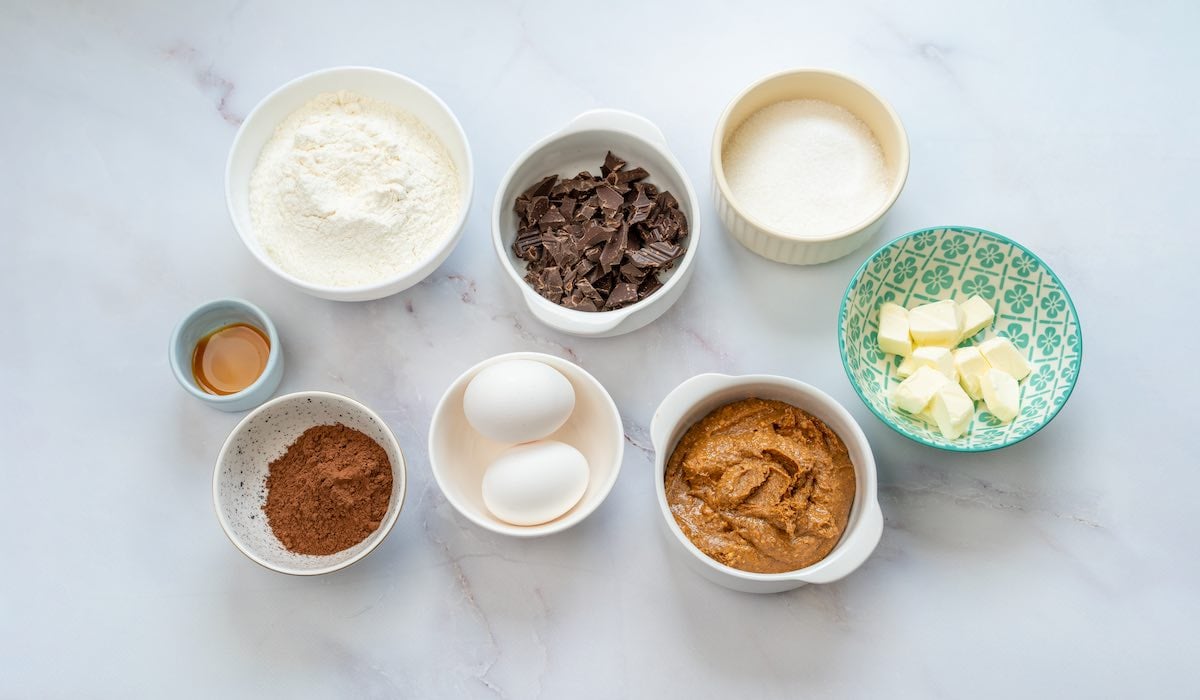
Find the printable recipe with measurements below.
- Biscoff spread. To stuff between the brownies!
- All-purpose flour. Also known as plain flour. Be sure to sift the flour very well to ensure there are no clumps throughout.
- Cocoa powder. 100% unsweetened and Dutch-processed cocoa powder. For a richer flavor, I love using dark or black cocoa powder.
- Baking powder. Gives some rise and stability to the brownies.
- Salt. A pinch just to bring out the intense chocolate flavor.
- Chocolate. Either chocolate chips or a chopped-up bar of chocolate. Since sugar is already added, I prefer to use a dark chocolate bar.
- Sugar. White or uncut white sugar. You can use brown sugar, but the tops won’t be as crackly.
- Butter. Softened and unsalted. If not strictly vegan, use regular butter instead.
- Vanilla extract. A must for any good brownie recipe.
- Eggs OR egg substitutes. I made my flax eggs by replacing the water with coffee for an even richer chocolate flavor.
How to make Biscoff brownies
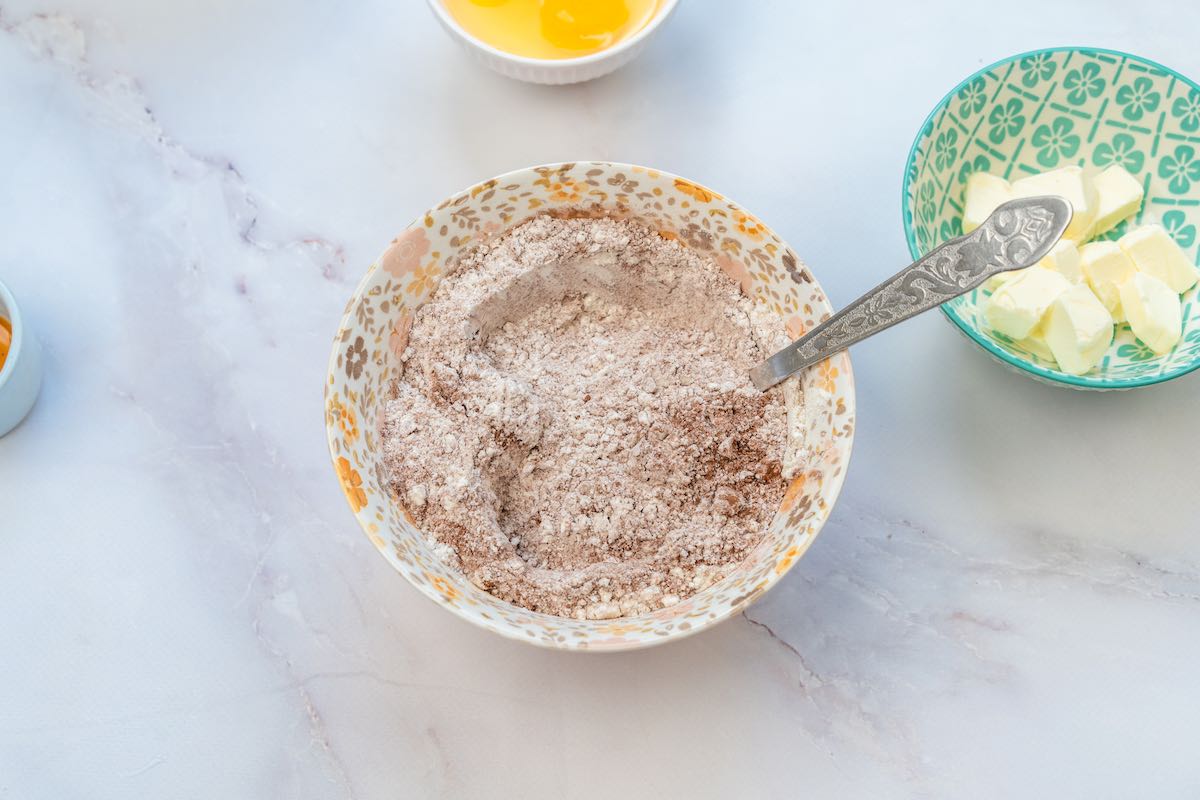
Step 1- Prep the ingredients. In a small bowl, combine the flour, cocoa powder, baking powder, and salt, and mix well.
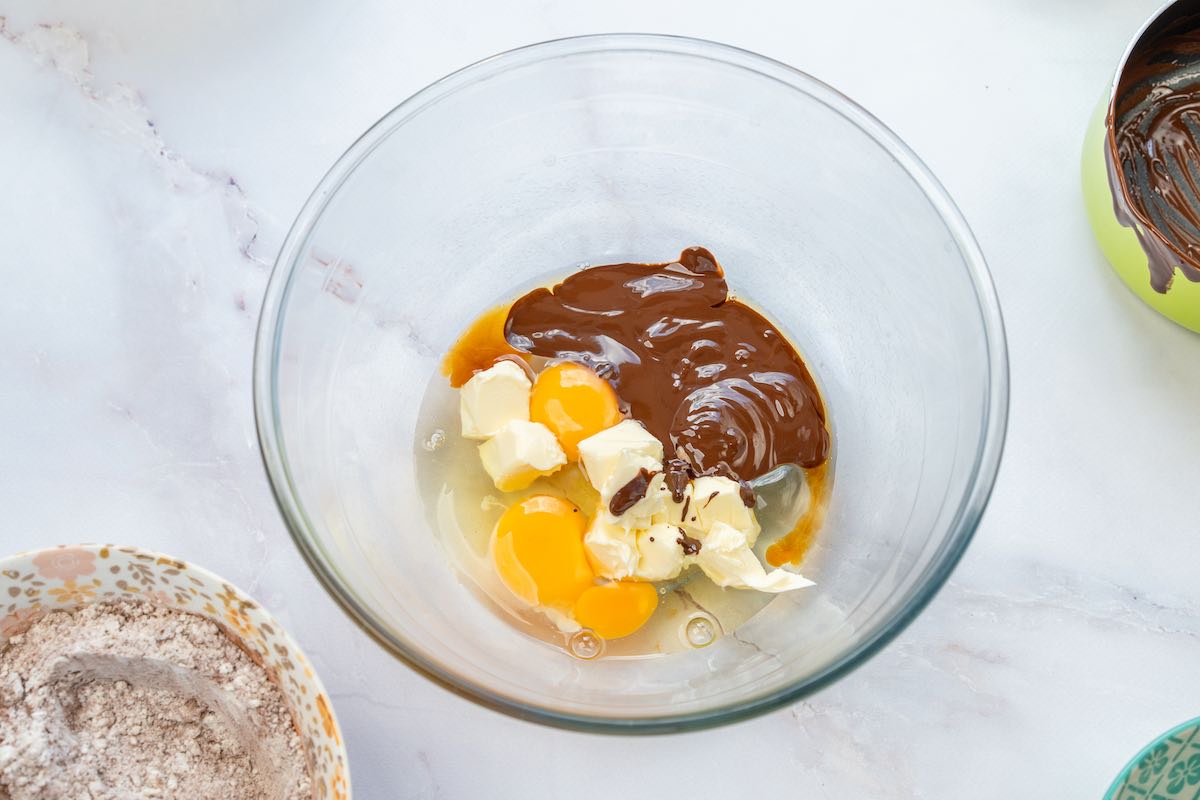
Step 2- Melt. In a microwave-safe bowl, add half the chocolate and microwave it until melted. In a large mixing bowl, combine the sugar and butter, then whisk until well incorporated. Whisk in the vanilla, eggs, and melted chocolate.
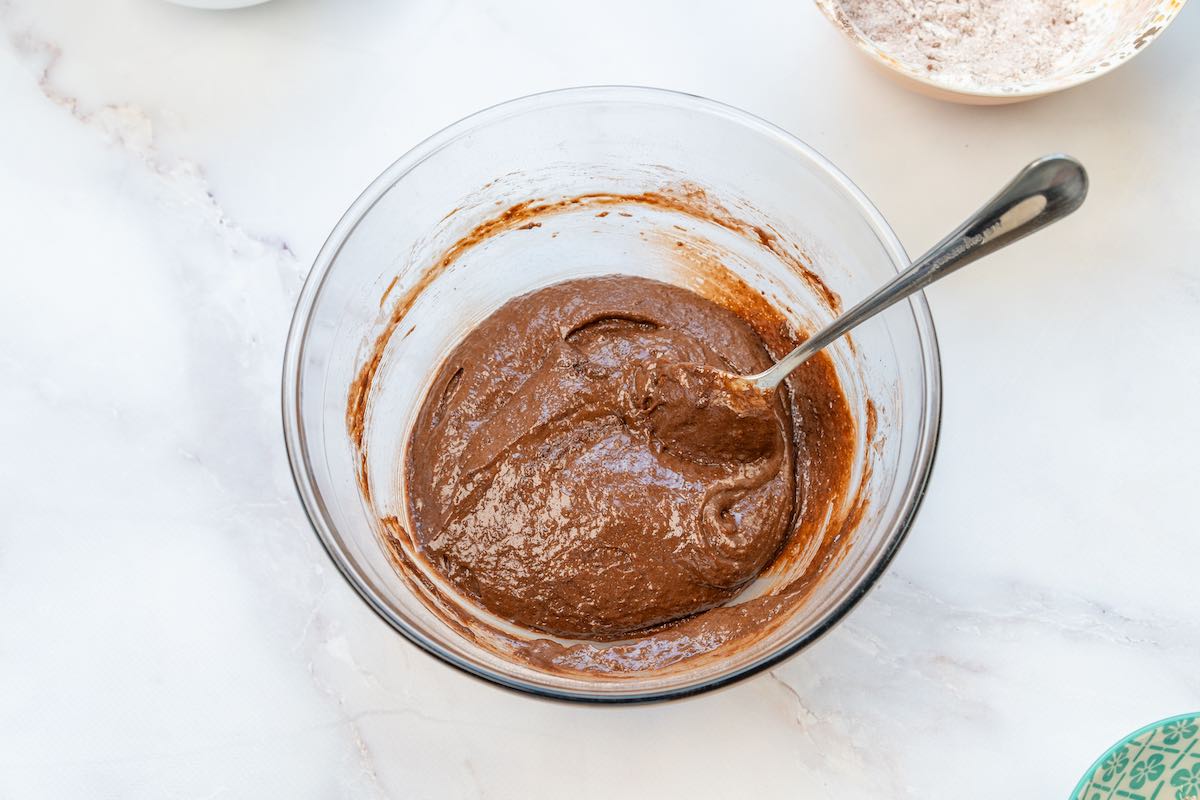
Step 3- Combine. Gently fold through the dry ingredients, followed by the remaining chocolate.
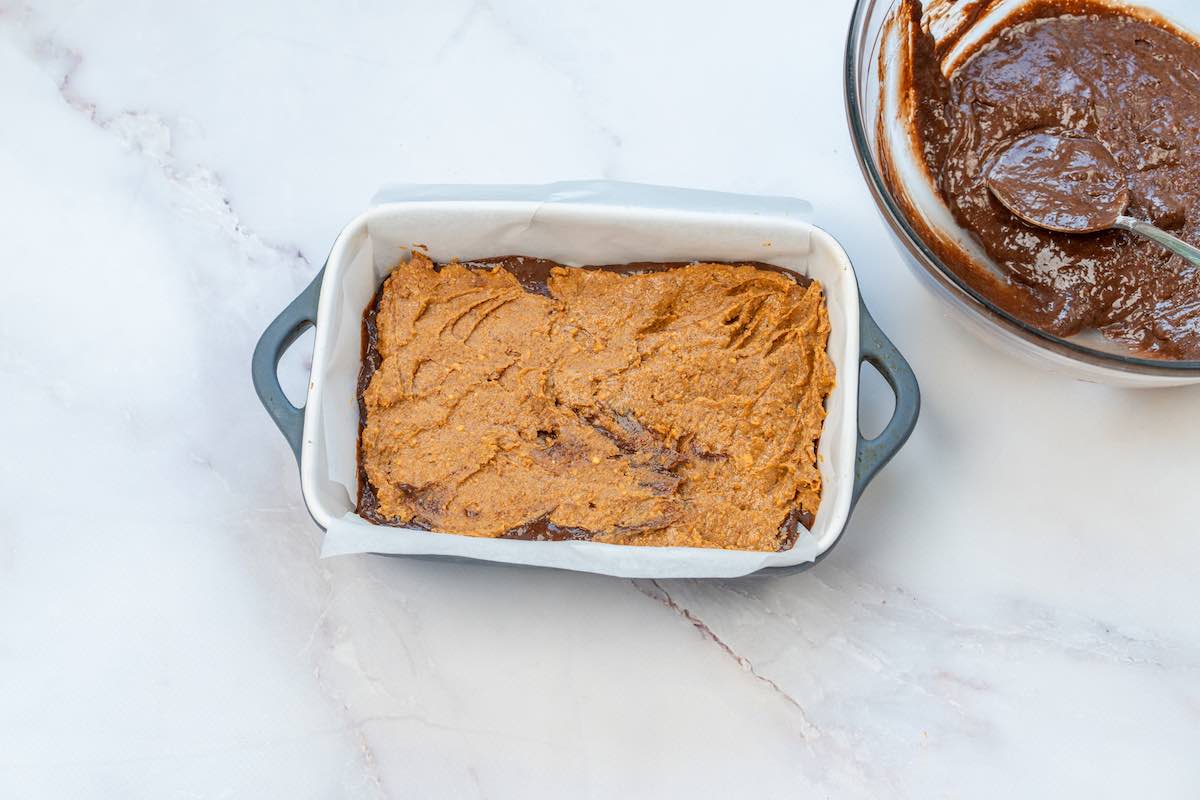
Step 4- Assemble. Remove the baking dish from the freezer and remove the firm layer of Biscoff spread from it. Pour half of the brownie batter mixture into the lined pan. Add the Biscoff layer, followed by the remaining brownie batter.
Step 5- Bake the brownies for 40-45 minutes or until a skewer comes out mostly clean. Let the brownies cool completely before slicing.
Arman’s recipe tips
- Make a slightly less sweet filling. I tested a half peanut butter, half Biscoff combo, and it balances the sweetness perfectly- especially for readers who found the full Biscoff layer too rich.
- Use a metal pan. In my tests, the metal pan guaranteed the crackly top. When I tried glass and ceramic, the brownies remained slightly soft in the middle, and the tops never quite developed a shine.
Don’t skip the freeze. Freezing the Biscoff spread is key- it keeps the layer intact during baking. Without this step, you’ll end up with the spread mixed into the batter. - Extend the baking time. Everyone’s oven varies – mine finished at 42 minutes, but some readers have said it has taken them up to 50 minutes. Always use the toothpick test to check.
- Leave parchment paper sticking out. I learned the hard way when I started baking, and all the brownies kept sticking to the pan. Now, it’s easy to remove (and no clean up!).
Recipe variations
I experimented with these brownies to intensify the Biscoff flavor even further. Here are some fun variations:
- Top the brownies instead of filling them. If I don’t have time to let the Biscoff chill in the freezer, I’ll make the brownies as is and drizzle the Biscoff cookie butter on top.
- Bake a Biscoff swirl. When I’m feeling extra fancy, I like to drizzle some Biscoff cookie spread on top of the brownie batter, then use a toothpick to create fun swirling patterns right before baking.
- Add more Biscoff flavor. Top the brownie batter with Biscoff cookie pieces or line the bottom of the baking tin with cookies before adding the batter (or perhaps do both!).
Storage instructions
To store: Leftover brownies can be stored at room temperature in an airtight container. They will keep well for up to 1 week. Alternatively, they can be stored in the refrigerator for up to 2 weeks.
To freeze: Place brownies in a ziplock bag and store them in the freezer for up to 6 months.
Frequently asked questions
You can, however, you may struggle with the Biscoff spread as it contains gluten-derived ingredients. I have seen more and more nut-free/gluten-free biscuit-style spreads, but I can’t vouch for them personally. As for the brownies, I had success with Bob’s Red Mill gluten-free flour.
Yes, you can. Many grocery store versions of cookie butter will work. Other sweet spreads, such as pistachio butter, Nutella, or almond butter, are great alternatives.
Biscoff Brownies
Video
Ingredients
- 1 cup Biscoff spread
- 3/4 cup all purpose flour
- 1/4 cup cocoa powder
- 1 teaspoon baking powder
- 1/4 teaspoon salt
- 8 ounces chocolate or chocolate chips, divided
- 1 cup sugar
- 1/2 cup butter softened
- 2 teaspoon vanilla extract
- 2 eggs or flax eggs * See notes
Instructions
- Preheat the oven to 180C/350F. Line an 8 x 8-inch pan and pour your Biscoff spread into it and spread out in an even layer. Place the pan in the freezer to firm up while you prepare the other ingredients.
- In a small bowl, add your flour, cocoa powder, baking powder, and salt, and mix well. Set aside. In a microwave-safe bowl, add half the chocolate and microwave it until melted.
- In a large mixing bowl, combine the sugar and butter, then whisk until well incorporated. Add the vanilla, eggs, and melted chocolate, and whisk until combined. Gently fold through the dry ingredients, followed by the remaining chocolate.
- Remove the pan from the freezer and remove the firm Biscoff spread from it. Transfer half the brownie batter into the lined pan. Add the thick layer of Biscoff, followed by the remaining brownie batter. Place the pan in the oven and bake for 40-45 minutes, or until a skewer inserted into the center comes out mostly clean.
- Remove the brownies from the oven and let them cool completely, before slicing and serving.
Notes
- Tips: See my recipe tips for making the best Biscoff brownies.
- Egg substitute: To make flax eggs, combine two tablespoons of ground flaxseed in a bowl and add six tablespoons of water or black coffee on top. Whisk together, and let the mixture sit for 10 minutes, for a gel to form.
- Vegan: Replace the butter with vegan butter and use vegan chocolate chips.
- Leftovers: Keep at room temperature for up to one week or in the freezer for 6 months.


I like the look of this recipe, but I’m in Australia and we always use grams and mls for baking. I hate recipes in cups unfortunately.
Sorry to hear that, Deanna- good news though- My team and I are working on testing every single recipe to provide accurate metric measurements for all of them. Hoping to start adding them in over the next month or two.
Such an amazing recipe. Biscoff is everything.
What a nice looking dessert. I actually want to make Biscoff spread on my own, using Biscoff biscuits. Is it possible?
I prepared this today. I bought many Biscoff cookies and this was sooo good!
I made my own spread for this! It comes out quite well, but you need a lot.
2 full tubs of Earth’s Own 227g cream cheese
Biscoff cookies, crushed or blended into a fine powder, with some larger crumbs for texture. I did not measure, I just used my eyes and tasted as I was adding the powder in. It didn’t use a full sleeve of the cookies though.
I added a little bit of Earth’s Own oat milk into the filling mixture as well, probably only 1/4 or 1/3 of a cup.
Ignis!!!! Thank you so much for sharing your own homemade Biscoff spread! I’d love to try this out- it sounds soooooo good.
These brownies turned out fantastic- I literally buy biscoff every other week to make a batch. Hehe!
Wendy- I love that. Thanks for making my recipe and leaving a lovely review. I appreciate it!
Can these be made with almond flour and inulin?
Thanks Phil
Not that I’ve tried but you are welcome to experiment and see
I’m pretty good at stuffing things up, but this recipe turned out perfectly. Cheers!
Hiii
I tried these brownies for my son’s birthday and he absolutely lovedddd it
Thanks for sharing such a wonderful recipe
Waiting to try more of your recipes
Keep smiling and spreading your good work
Thank you, Kanchan!
Hi,
I generally like your recipes, unfortunately, for me as a European reader (and baker) it’s rather difficult to follow the instructions without the measurements being in grams and mililiters. So it would be amazing if you added those. Otherwise a fantastic recipe!
Annika