Chicken Yakitori
This post may contain affiliate links. See my disclosure policy.
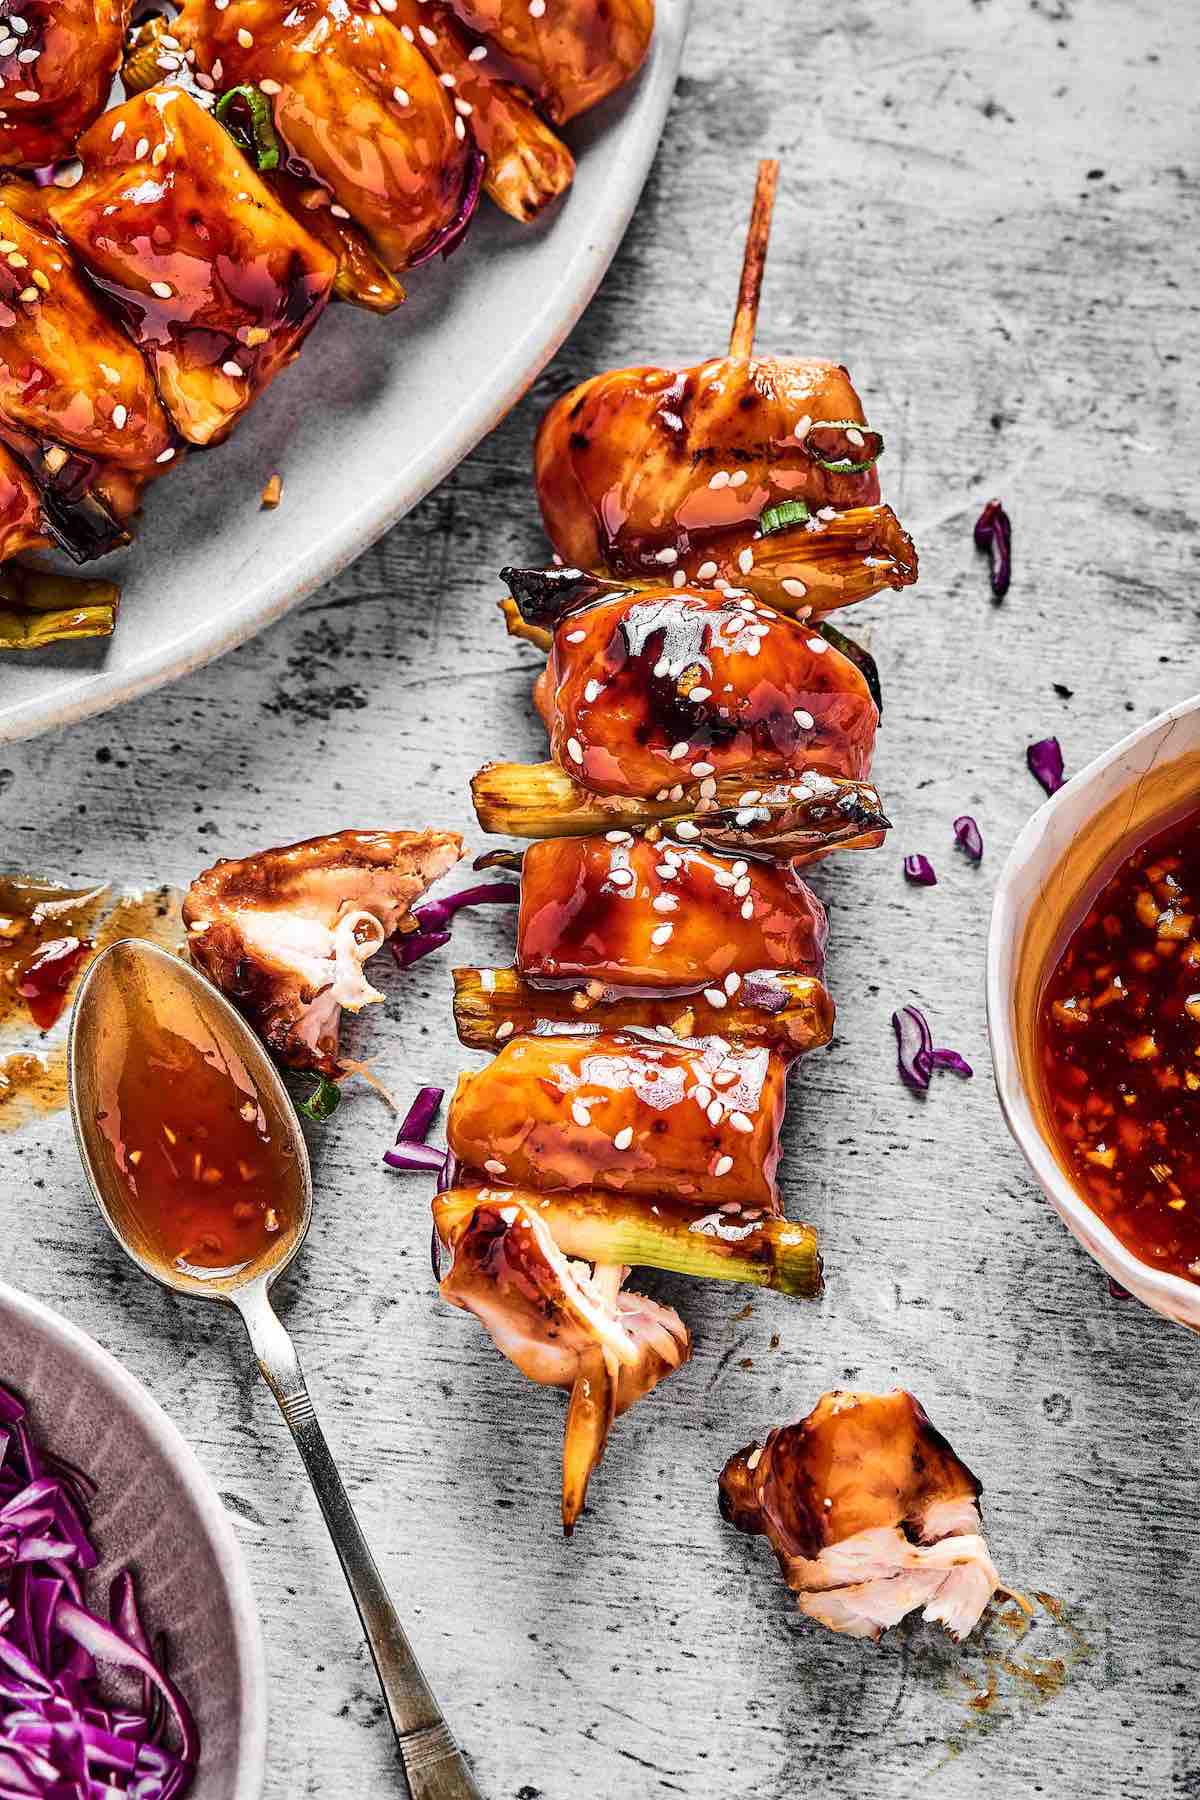
My restaurant style chicken yakitori recipe uses simple ingredients and makes for juicy, mouthwatering skewers enveloped in a savory, umami glaze. Ready in under 15 minutes!

Table of Contents
Chicken yakitori was my go-to appetizer every time my family and I would get Japanese food. I’ve become a bit obsessed since I discovered how easy it is to make at home.
If you aren’t familiar with yakitori, it is one of Japan’s most popular yet underrated dishes. “Yaki” translates to “grilled,” and “tori” means “chicken” or “bird.” It’s usually composed of bite-sized chicken pieces skewered and grilled with a simple sauce known as “tare.”
It uses everyday ingredients and is so versatile. The chicken is so juicy and moist and covered with a gorgeous sticky glaze. I either make it on the grill or in the oven, so I’ve included both those cooking methods.
If you love cooking Japanese food at home, try my chicken katsu, beef negimaki, pork katsu, and beef katsu next.
★★★★★ REVIEW
“I made this recipe after trying it at a Japanese restaurant, and wow- it really is restaurant style. I use the sauce mix as a marinade now too.” – Ariana
Ingredients needed
- Chicken. Chicken thighs can also be used, but I prefer the texture of chicken breasts, and since we’re adding a sauce, the chicken breasts won’t dry out.
- Green onion. To grill the chicken.
- Oil. Just enough for grilling.
- Sesame seeds. For garnish.
For the yakitori sauce:
- Soy sauce. Please do not use dark soy sauce or else it will be overpowering. I’ve had success using tamari for a soy-free option.
- Mirin. Also known as Japanese cooking wine. I can find it at almost every mainstream grocery store nowadays, but if you can’t, dry sherry or sake will also work. If you don’t want to cook with alcohol, substitute white vinegar and a dash of sugar for the cooking wine or use rice vinegar.
- Sugar. Just a dash will even out the other ingredients. I used regular white sugar, but brown sugar works.
How to make chicken yakitori
This is an overview with step-by-step photos. Full ingredients & instructions are in the recipe card below.
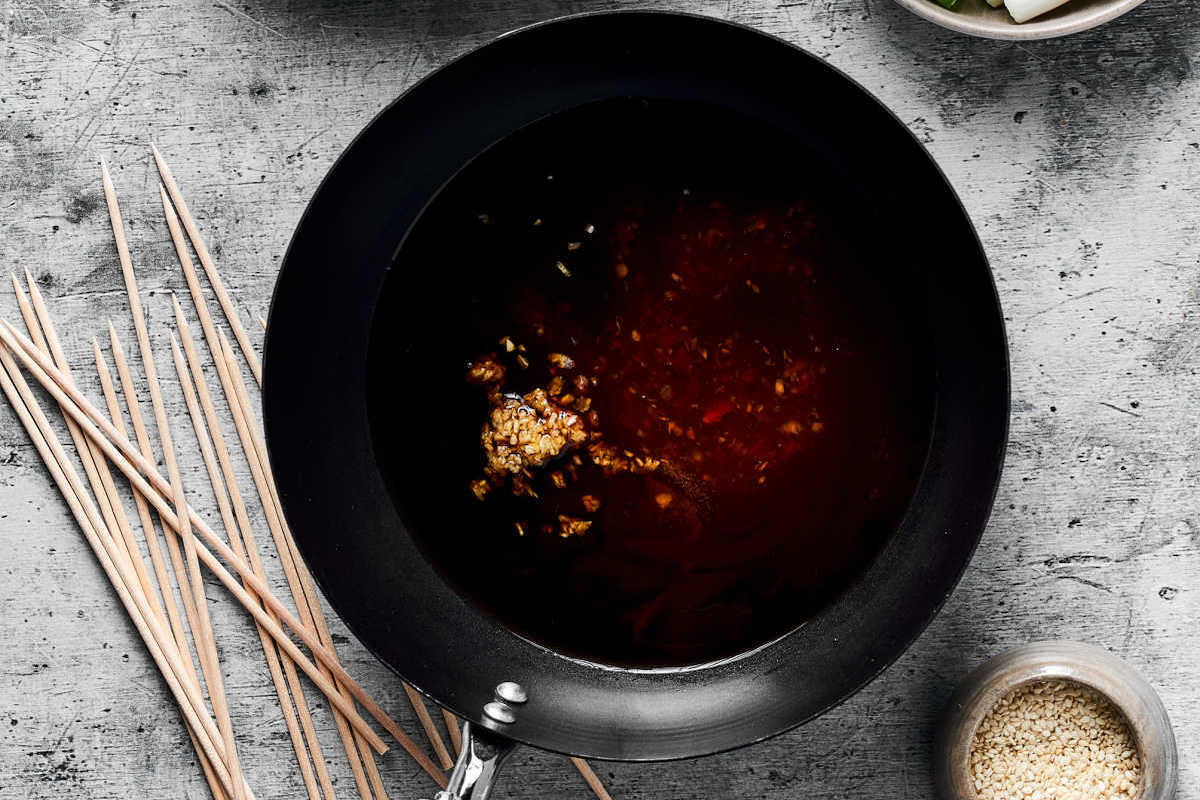
Step 1 – Make the sauce. Combine soy sauce, mirin, and sugar in a small saucepan over medium heat. Simmer on low for 5 minutes.
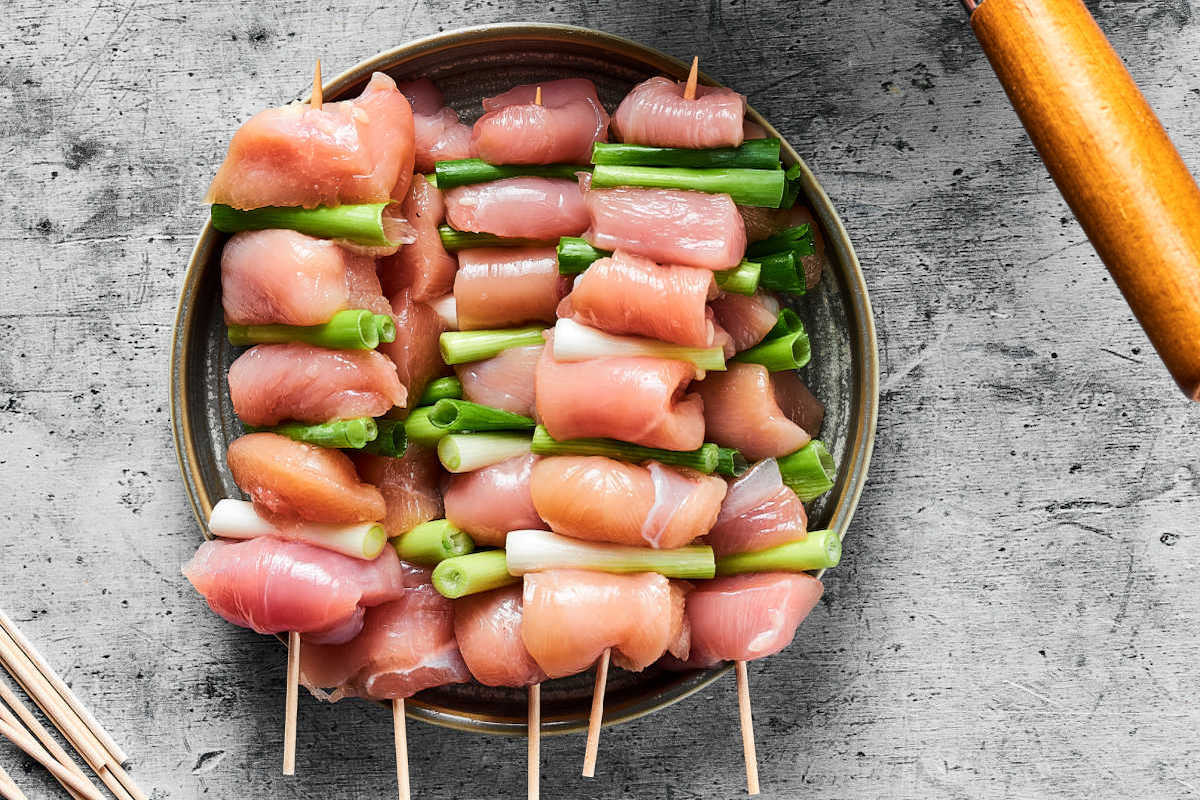
Step 3- Prep the chicken. Chop the chicken and green onions into 1-inch pieces and thread on skewers.
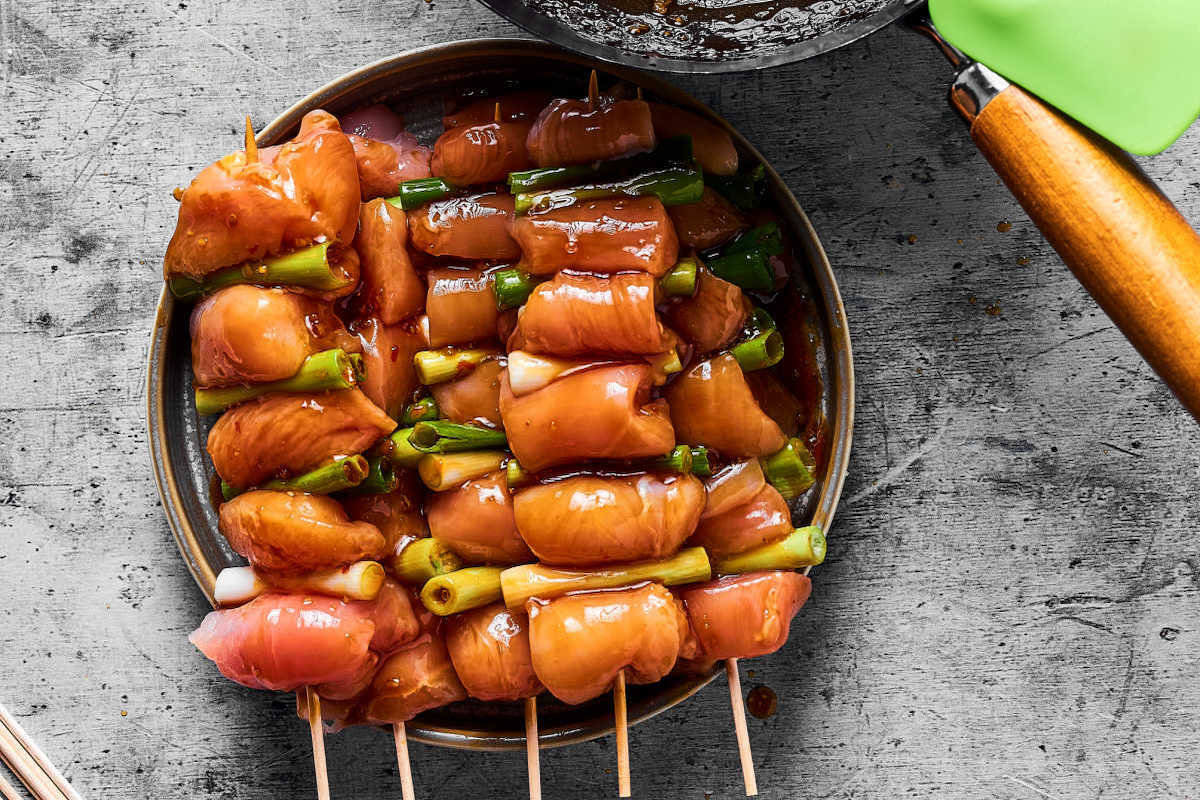
Step 3- Season. Brush yakitori sauce on all sides.
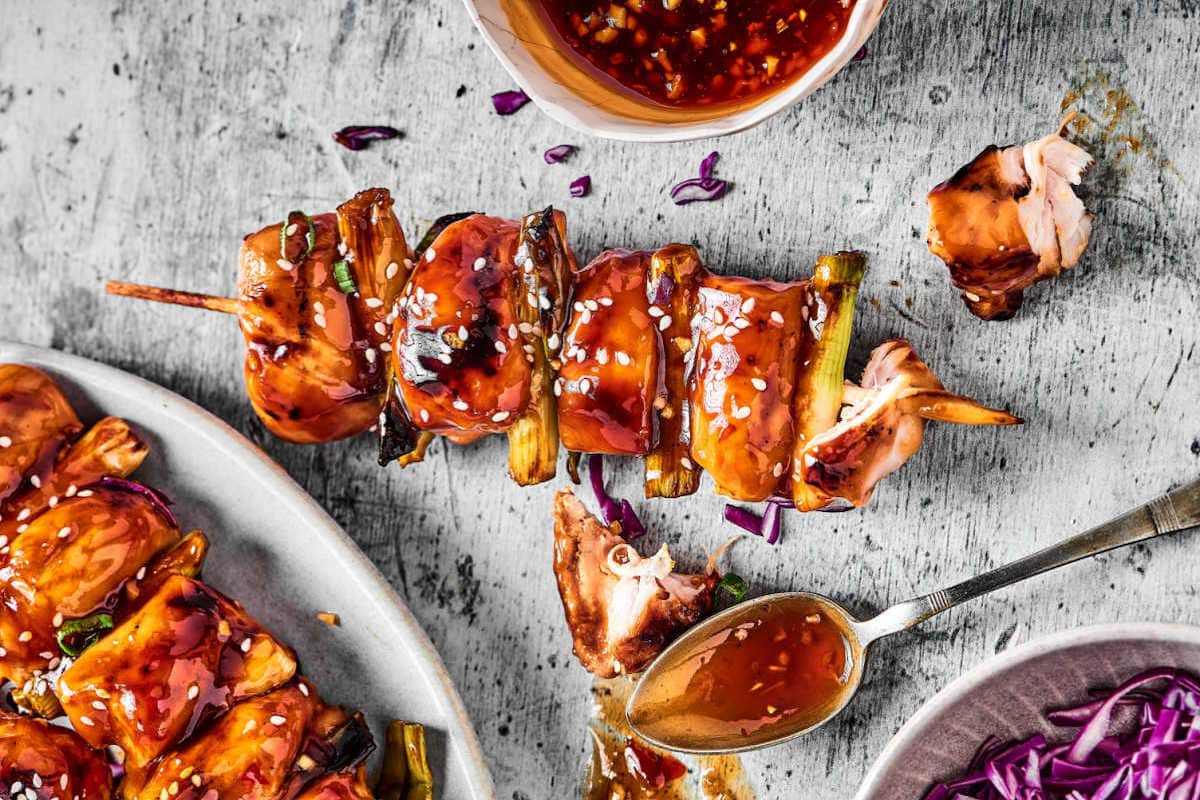
Step 4- Grill. Add oil to a grill or nonstick skillet. Once hot, add the yakitori and grill for 5 minutes, turning regularly.
Arman’s recipe tips
- Always soak the skewers. Trust me, this is NOT negotiable! If the skewers aren’t soaked in water, they’ll burn on the grill. If you don’t want to soak skewers, invest in a pair of stainless steel skewers instead.
- Make sure there’s no space between the chicken and green onions, or else the skewers burn.
- Keep an eye on them. I can say from experience it’s easy to burn chicken skewers, so stay close by and continue flipping often until the chicken is fully cooked.
- Marinate for longer. The beauty of this recipe is that the chicken can be marinated in advance, up to 2 days, and kept in the fridge until you’re ready to grill.
- Cut the chicken into bite-sized pieces. So they cook evenly.
- Use other cuts of chicken. Yakitori can be made with any cut of chicken. This includes chicken livers, gizzards, hearts, you name it! So feel free to get creative and try something new.
Storage instructions
To store: Leftover yakitori should be stored in an airtight container and kept in the refrigerator for up to one week.
To freeze: Let your leftovers cool completely, then remove the chicken and green onions from the skewers, store them in a freezer-safe container, and freeze them for up to 3 months. Let the chicken thaw overnight in the fridge or add more reheating time.
To reheat: Reheat leftovers in an oven at 300F or in the microwave until warm.
Frequently asked questions
While both teriyaki and yakitori have a similar savory and sweet flavor profile, teriyaki sauce usually has ginger and garlic added. Another big difference is that yakitori is made exclusively with chicken, whereas teriyaki can be made with other proteins, like beef.
Serving ideas
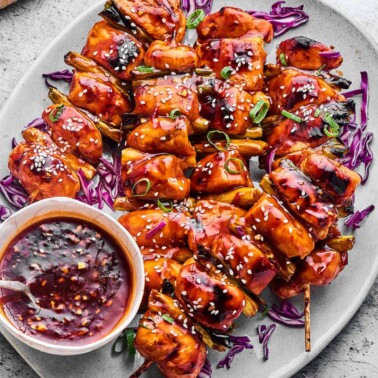
Yakitori is a type of Japanese street food that doesn’t need much to taste great. If I’m serving it as an appetizer, I’ll put the skewers on a bed of green salad with extra sauce for dipping. Otherwise, I’ll serve it with-
If you tried this Chicken Yakitori recipe or any other recipe on my website, please rate the recipe and let me know how it went in the comments below. It really helps others thinking of making the recipe.
Chicken Yakitori
Video
Ingredients
- 2 small chicken breasts skinless and boneless
- 4 large green onions
- 2 tablespoons oil to grill
For the yakitori sauce
- 2/3 cup soy sauce
- 2/3 cup mirin
- 1 1/2 tablespoons sugar
Instructions
- Place 10 bamboo shoots in cold water for 5 minutes.
- In a small saucepan, add the soy sauce, mirin, and sugar, and place over medium heat. Once it simmers, reduce it to low and let it simmer for 5 minutes.
- Chop the chicken and green onions into 2-inch pieces.
- Add the chicken and green onions to the soaked skewers. Once all the chicken is skewered, brush yakitori sauce on all sides.
- Add some oil to a grill or non-stick skillet. Once hot, add the chicken yakitori and grill for 5 minutes, regularly turning.
- Remove the skewers off the heat and let sprinkle with more green onions and sesame seeds.


I made this for a fun Asian-inspired dinner, and my guests could not get enough of them. These are sensational, Arman.
Thanks so much for the lovely review, Elyce- I’m glad your guests enjoyed them!
Wow sounds and looks delicious. I like Japanese food very much but I never tried to make it home.
Chicken and soy sauce go so much well together. Need to try this
Looks so easy will definitely make. Thanks