Dairy Free Frosting
This post may contain affiliate links. See my disclosure policy.
My 2 ingredient dairy-free frosting is thick and creamy yet fluffy and full of rich chocolate flavor. No oil or powdered sugar is needed.
Looking for more frosting recipes? Try my healthy frosting and keto frosting next!
Everything is better with frosting. Well, maybe not everything. I mean, could you imagine scrambled eggs with frosting? Um, no thank you.
I used to think buttercream was a non-negotiable to produce a thick and creamy chocolate frosting. That, or actual cream. It wasn’t until I experimented with coconut cream that I could make the most incredible chocolate frosting sans-dairy.
Table of Contents
Why I love this recipe
- Yes, you actually only need 2 ingredients. And once you make my frosting recipe, they’ll become pantry staples.
- Naturally diet-friendly. 99% of frosting recipes call for butter or dairy, but not mine!
- No powdered sugar. Yet you still get that fluffy, sweet texture.
- You can make it on a whim. Nothing is sadder than baking a gorgeous tiered cake only to realize you forgot to buy frosting. Never again!
Ingredients needed
- Coconut cream. Don’t skimp here! Stick with canned, full-fat coconut milk from a can, NOT a carton. Chill it until the cream solidifies, then drain the excess juice (and use it for coconut smoothies!).
- Semi-sweet chocolate chips OR chocolate. I made my own vegan chocolate chips, but any kind of dairy-free chocolate can be used. Alternatively, use a chopped-up dairy-free chocolate bar.
How to make dairy free frosting
I’ve included step-by-step photos below to make this recipe easy to follow at home. For the full printable recipe instructions and ingredient quantities, scroll to the recipe card at the bottom of this post.
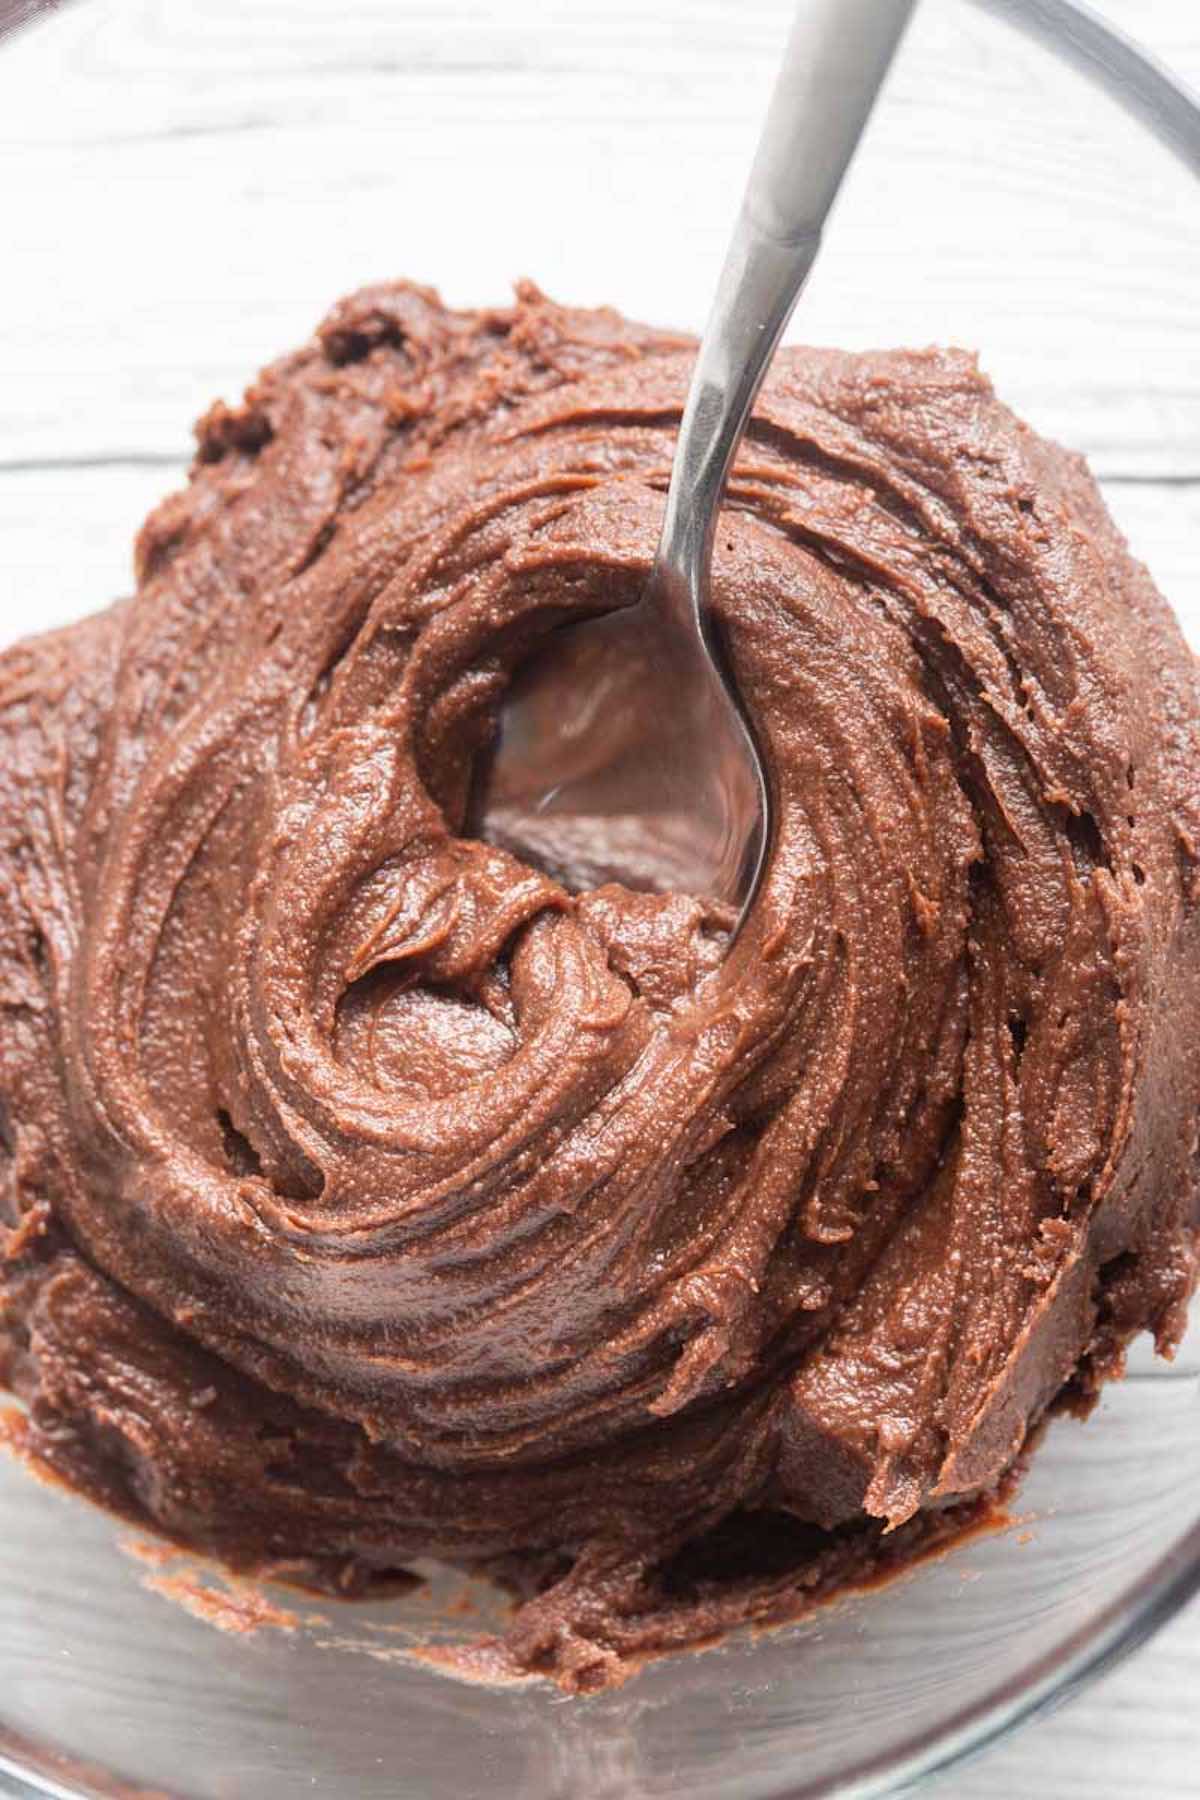
Step 1- Assemble. Add coconut cream to a mixing bowl (discarding the liquid). Melt chocolate chips in a microwave-safe bowl.
Step 2- Mix. Pour the melted chocolate into the mixing bowl and stir until glossy and smooth. Chill until firm.
Step 3- Mix again. Use a stick mixer to beat the mixture until it’s light and fluffy, then use as desired.
Arman’s recipe tips
- Skip the microwave. Melt the chocolate and coconut in a glass bowl over a saucepan filled with simmering water (AKA the ‘double boiler method’).
- Microwave the chocolate in batches. I’ve tried to cut corners and microwave the chocolate for 2 minutes, and let’s just say it became VERY burnt.
- Swap the chocolate. Whatever flavor of chocolate you choose will be the predominant flavor of the frosting. That means you can use dairy-free white chocolate chips, dark chocolate chips (70% cocoa content and above is dairy-free), or even peanut butter chips.
Storage instructions
To store: The frosting will keep fresh in an airtight container at room temperature for up to 5 hours or in the fridge for 5 days. Let it sit at room temperature briefly to soften.
To freeze: Place leftover frosting in a shallow container and store it in the freezer for up to 2 months. Let it thaw to room temperature, then re-beat until fluffy.
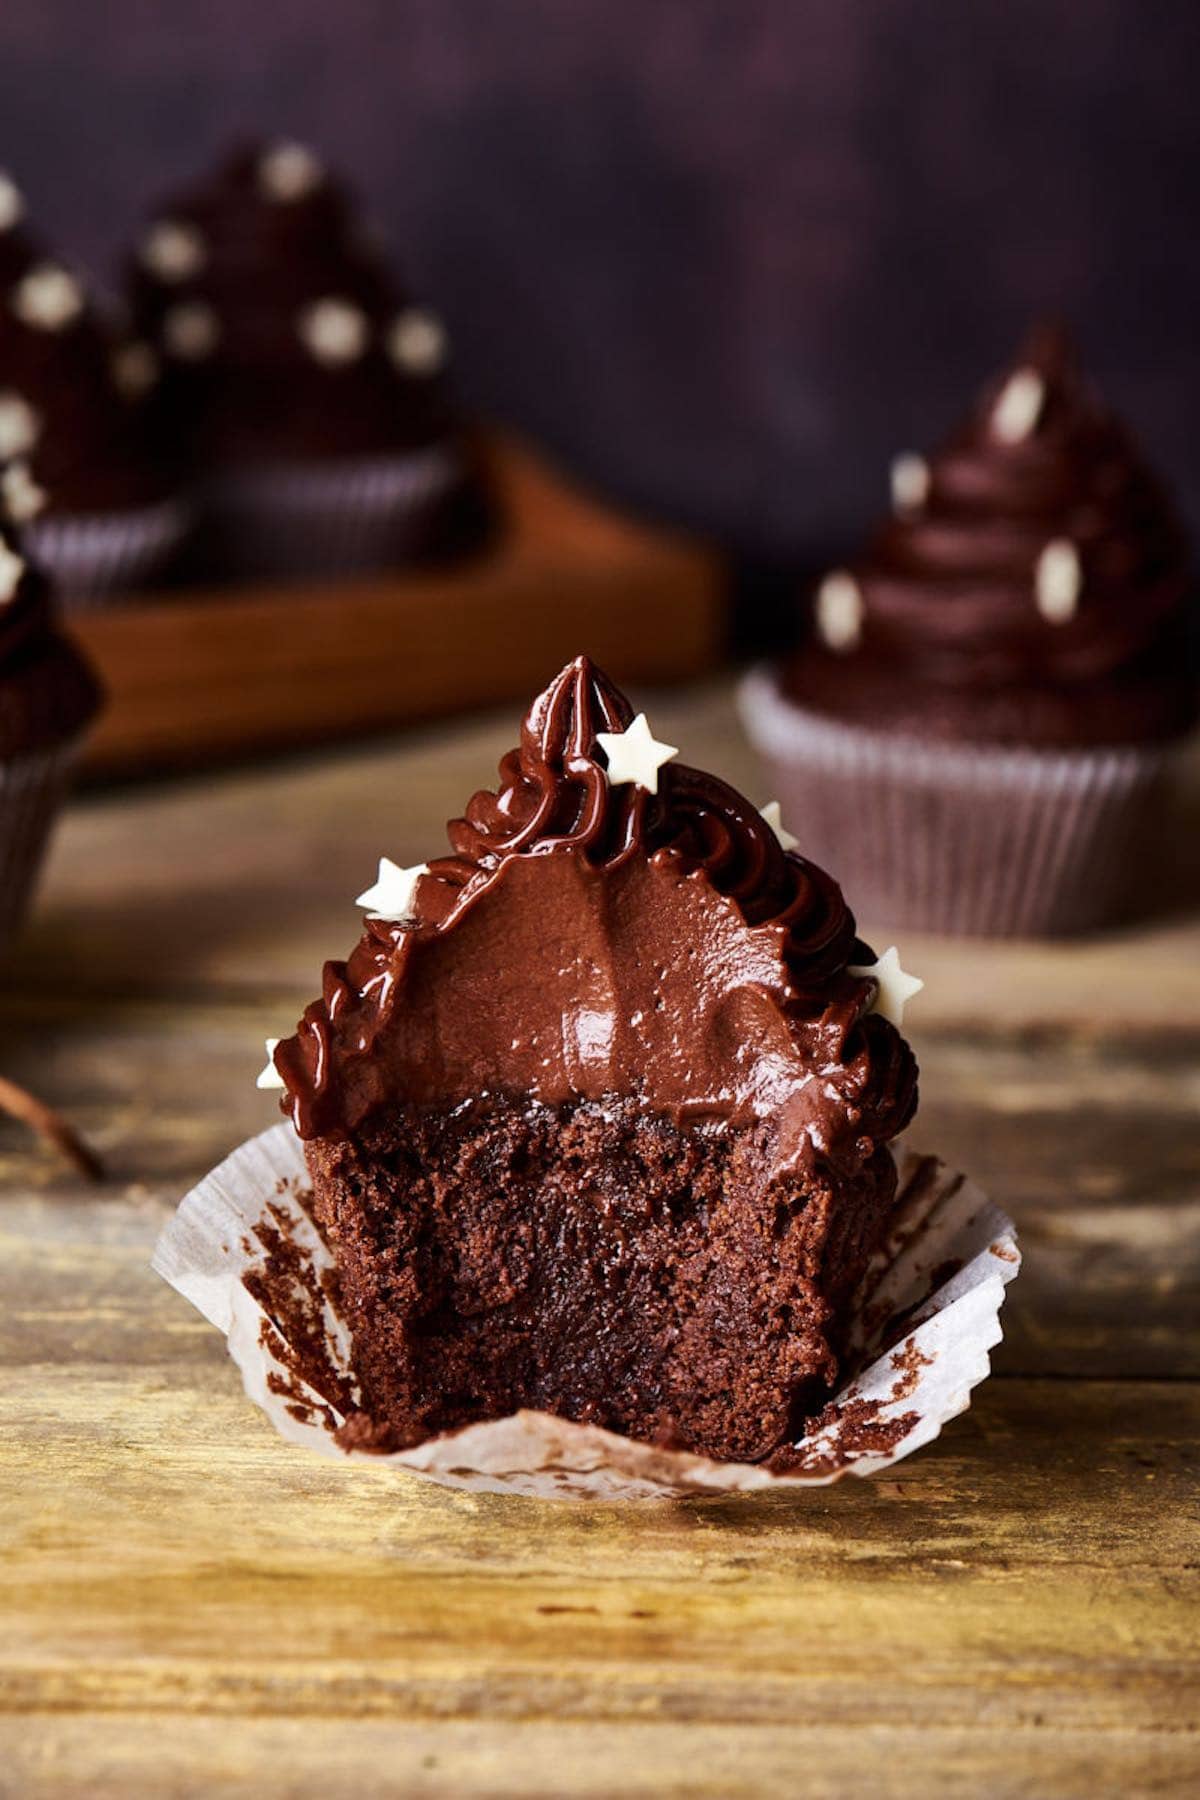
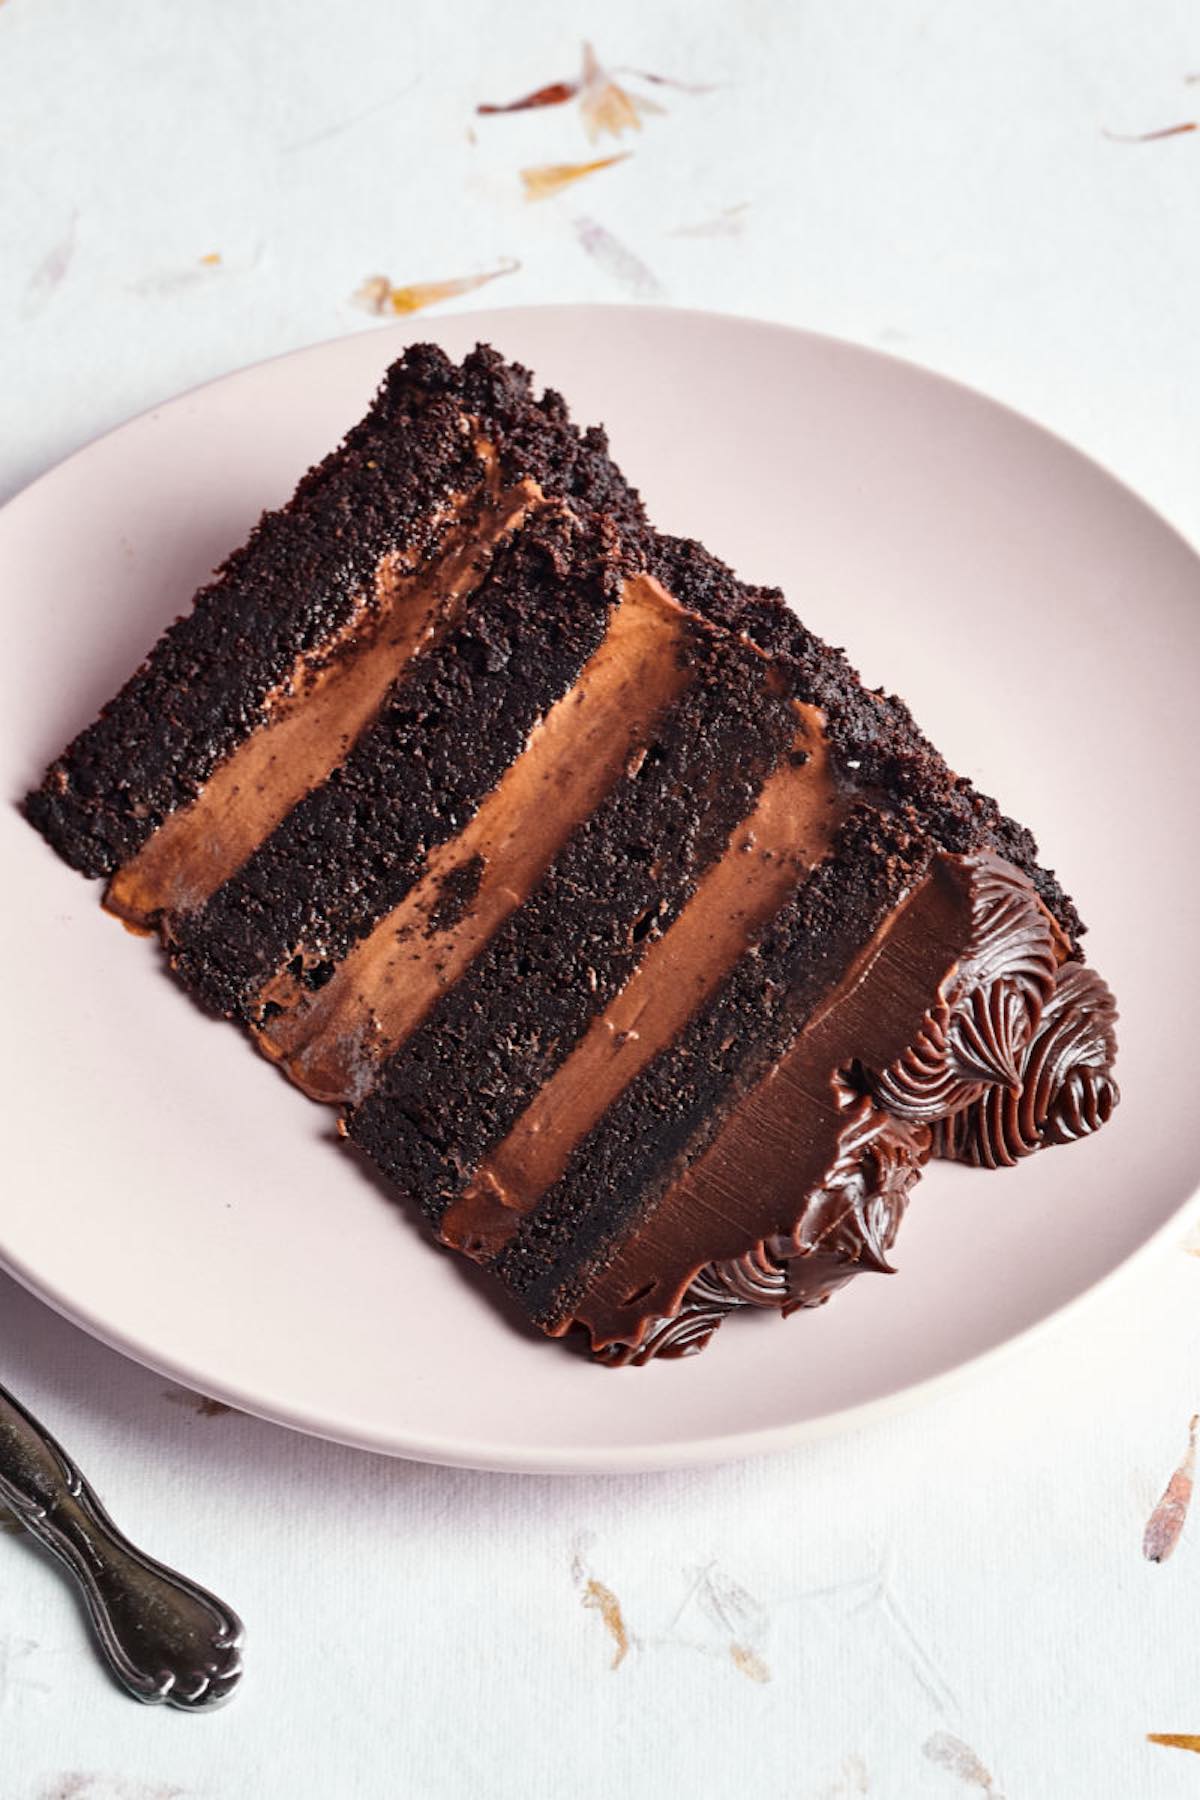
Recipes to use this frosting
2 Ingredient Dairy Free Frosting
Video
Ingredients
- 3/4 cup coconut cream chilled * See notes
- 1 1/2 cups dairy-free chocolate ** See notes
Instructions
- In a mixing bowl, add the chilled coconut cream and set aside. In a microwave safe bowl, add the chocolate and melt in 20-second spurts until melted.
- Add the melted chocolate into the mixing bowl and whisk together with the coconut cream until thick and glossy. Cover the bowl and refrigerate for at least two hours, to thicken.
- Remove the bowl from the refrigerator. Using a stick mixer, beat together the firm frosting until light and fluffy. Add on top of cakes, brownies, or pipe onto muffins or cupcakes.
Notes
Nutrition
Originally published August 2021, updated and republished October 2024


If you don’t have a stick mixer , can you use
a blender for making frosting.
That should be fine Nancy, you might just have to scrape down the sides a little bit between pulses and just make sure you go slowly and gently until you have the consistency you need.
I need vanilla or white frosting. Just eliminate the chocolate? Add vanilla?
No that won’t work for this. You can make my keto frosting and just use dairy free cream cheese 🙂