Dairy Free Bread
This post may contain affiliate links. See my disclosure policy.
Learn how to make dairy-free bread that bakes perfectly every single time. It’s crusty on the outside, pillowy on the inside, and full of flavor. It’s the perfect bread recipe for beginners.
If you’ve ever been intimidated by baking bread from scratch, you need to try my dairy-free bread recipe.
Made entirely without dairy or yeast, this easy bread recipe has the perfect texture, with a great crust on the outside and a fluffy, soft center. Plus, it toasts beautifully, so you can easily incorporate this quick bread into your everyday routine. It makes perfect sandwich bread, toast, or even French toast. Plus, since it’s so easy to make, you can enjoy homemade bread every week.
Table of Contents
Why I love this recipe
- Quick and easy. The step-by-step process is deceptively simple. Just combine the milk and vinegar, let it sit, then mix up the bread batter, shape the loaf, and let it bake.
- Simple ingredients. No oddball ingredients needed here! Just a handful of pantry staples you probably have on hand already.
- Freezer-friendly. This bread freezes exceptionally well, so I like to make a double-batch and store the extra loaf for last-minute bread emergencies.
- Vegan and easy to make gluten-free. This recipe makes naturally vegan bread, and it can easily be made gluten-free by using gluten-free flour.
If you love simple bread recipes, try my protein bread, keto bread, cottage cheese flatbread, and 2 ingredient bread next.
★★★★★ REVIEW
“Love this recipe! Make it a lot. Nice small batch for a single person. I kneaded in Light rye flour for a twist. Came out great.” – Lorrie
Key Ingredients
- Milk. I prefer oat milk or unsweetened almond milk, but you could use any non-dairy milk you prefer. Just make sure they aren’t sweetened or flavored.
- White vinegar. When combined with milk, the vinegar will curdle and give us a great buttermilk substitute. Apple cider and malt vinegar could also work, but the flavor would be pretty overpowering.
- All-purpose flour. I used regular white AP flour, but whole wheat or gluten-free flour blend could also work. If you do go the gluten-free route, I highly recommend Bob’s Red Mill.
- Baking soda. To give rise to the bread without needing yeast.
- Salt. Just a pinch for a little extra flavor.
- Sugar. For a touch of extra flavor, especially when combined with the salt. I’ve also used honey, and it works great.
How to make bread without dairy
This is an overview with step-by-step photos. Full ingredients & instructions are in the recipe card below.
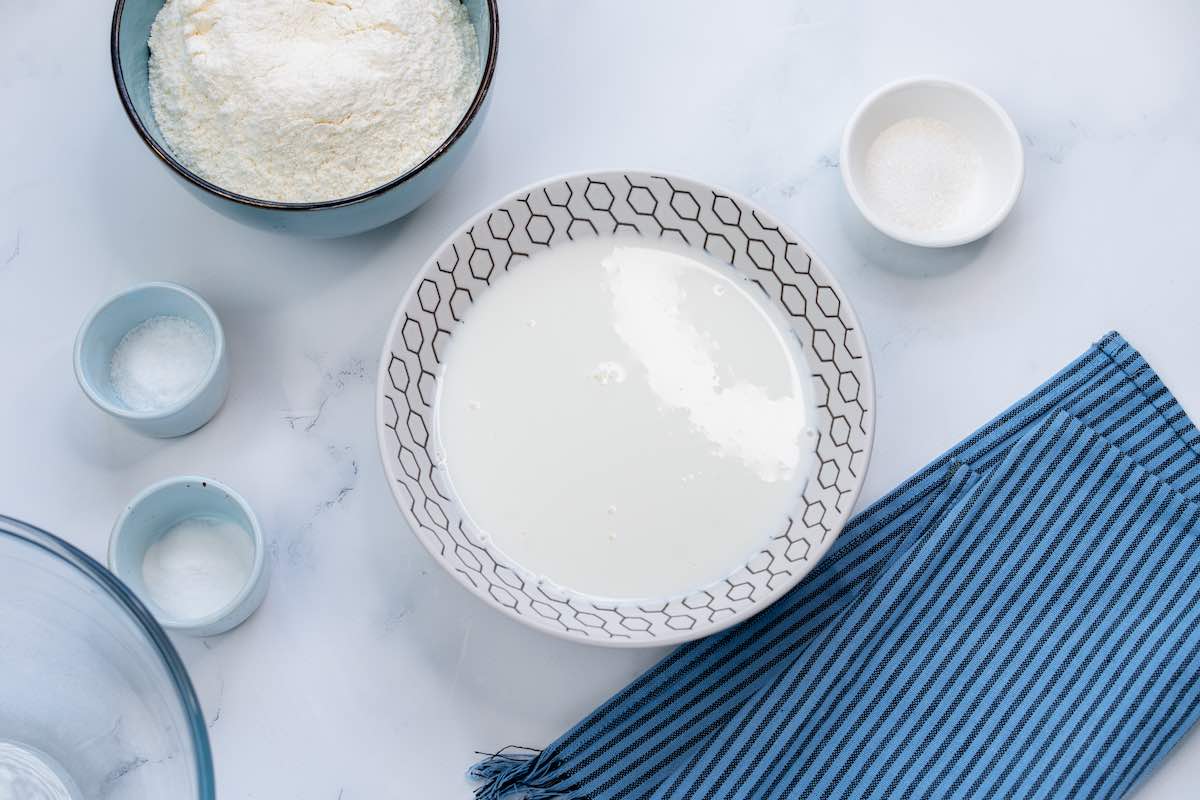
Step 1- Curdle milk. In a small bowl, combine the milk and vinegar and let sit until it curdles.
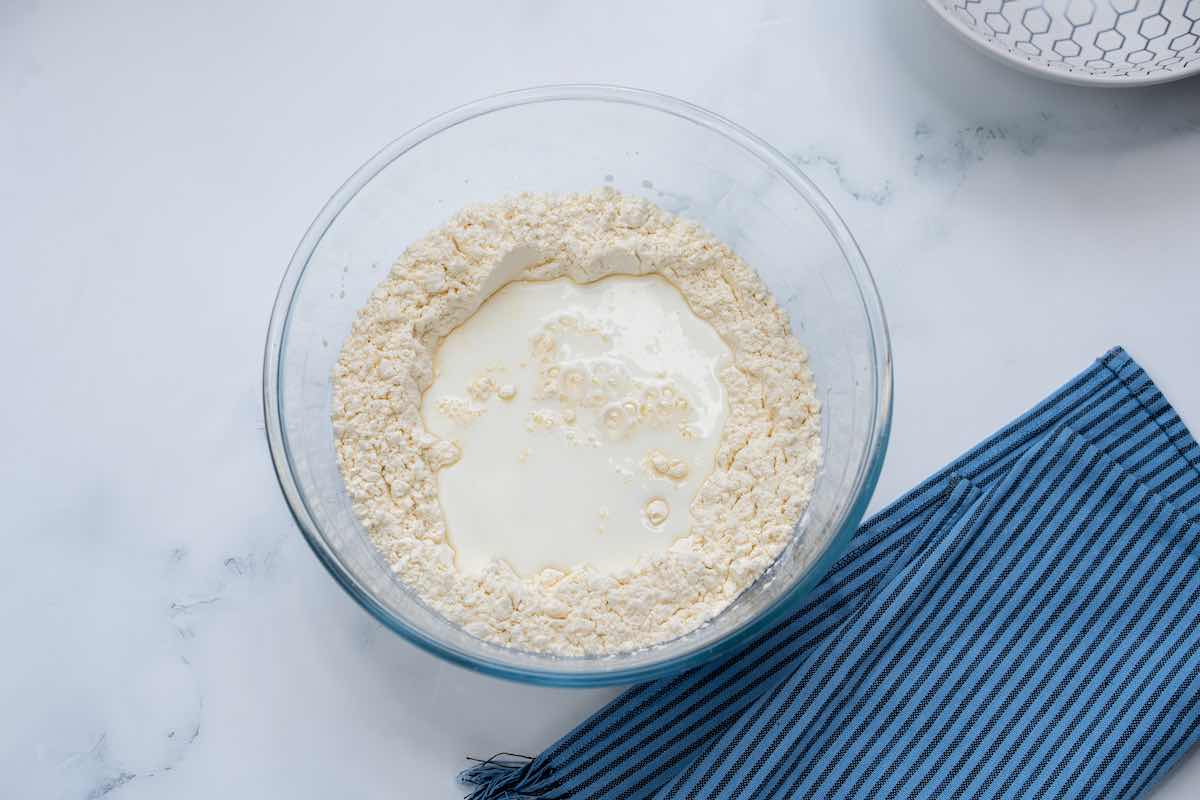
Step 2- Combine the ingredients. Mix flour, salt, sugar, and baking soda. Add curdled milk in two parts, mixing after each until just combined.
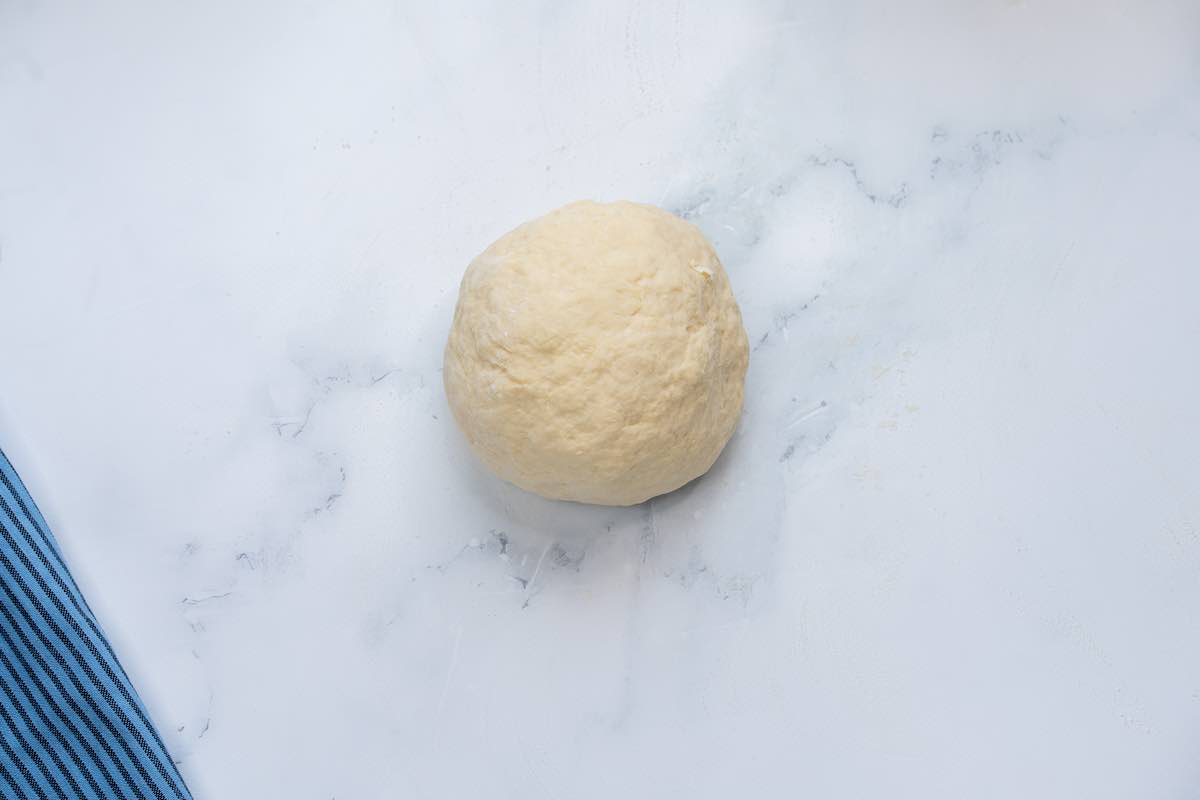
Step 3- Shape. Lightly flour a surface. Sprinkle a tablespoon of flour on the dough, then transfer it to the surface. Gently knead and shape into a dome.
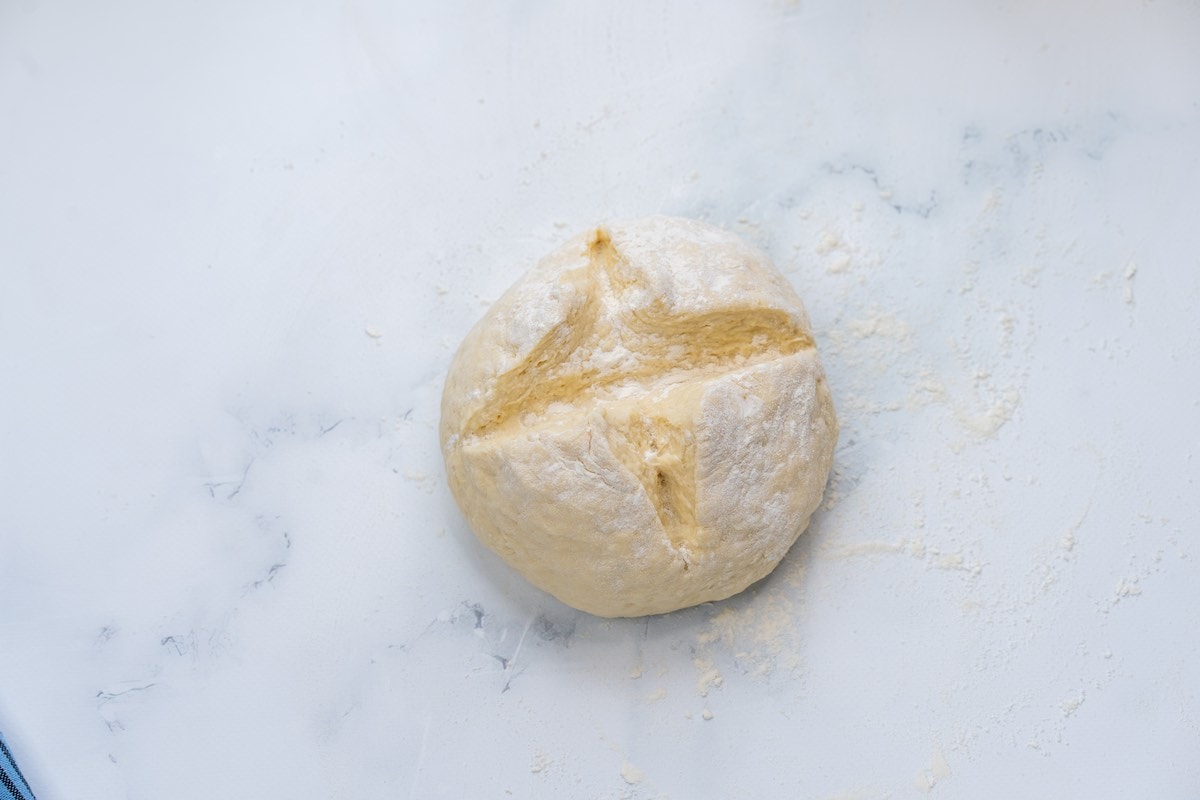
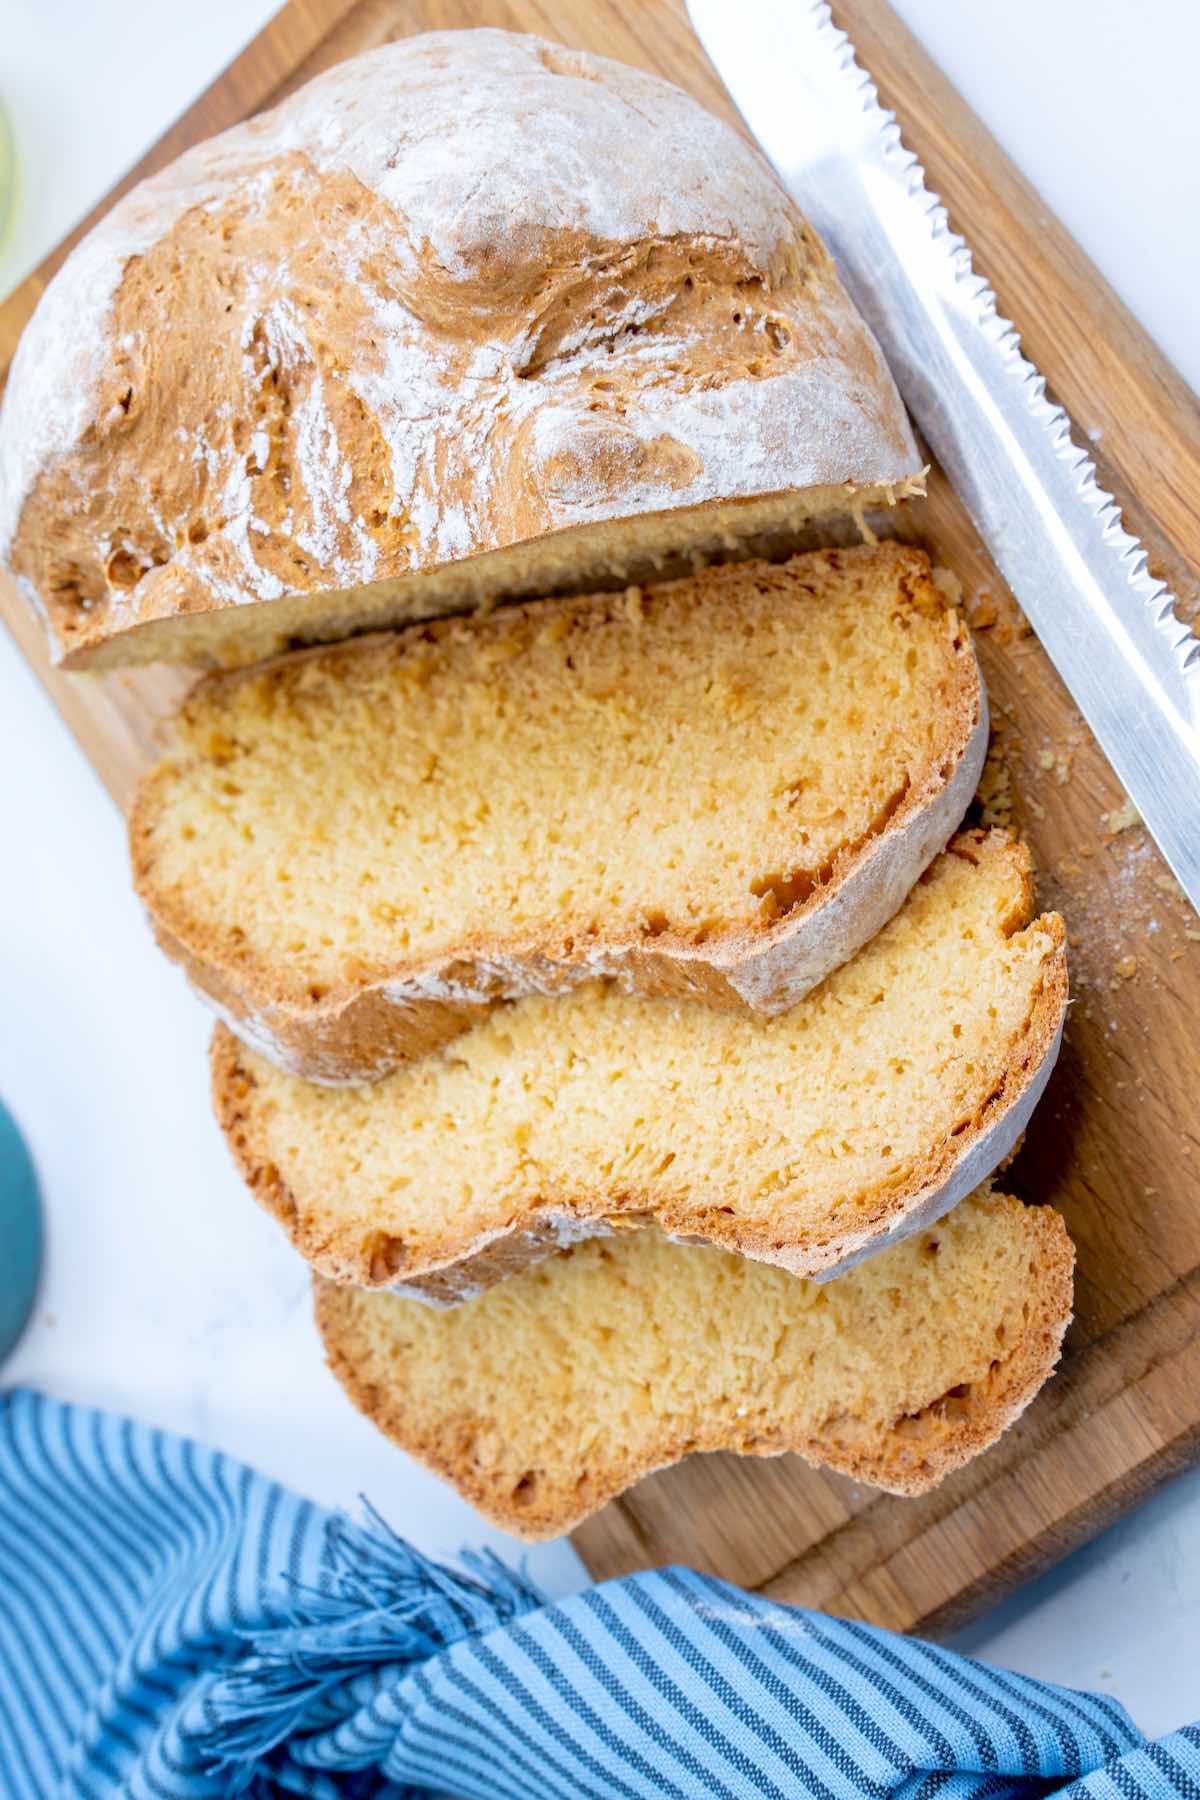
Step 4- Score. Using a sharp knife, slice twice across the dough to form a cross shape around ½ inch thick.
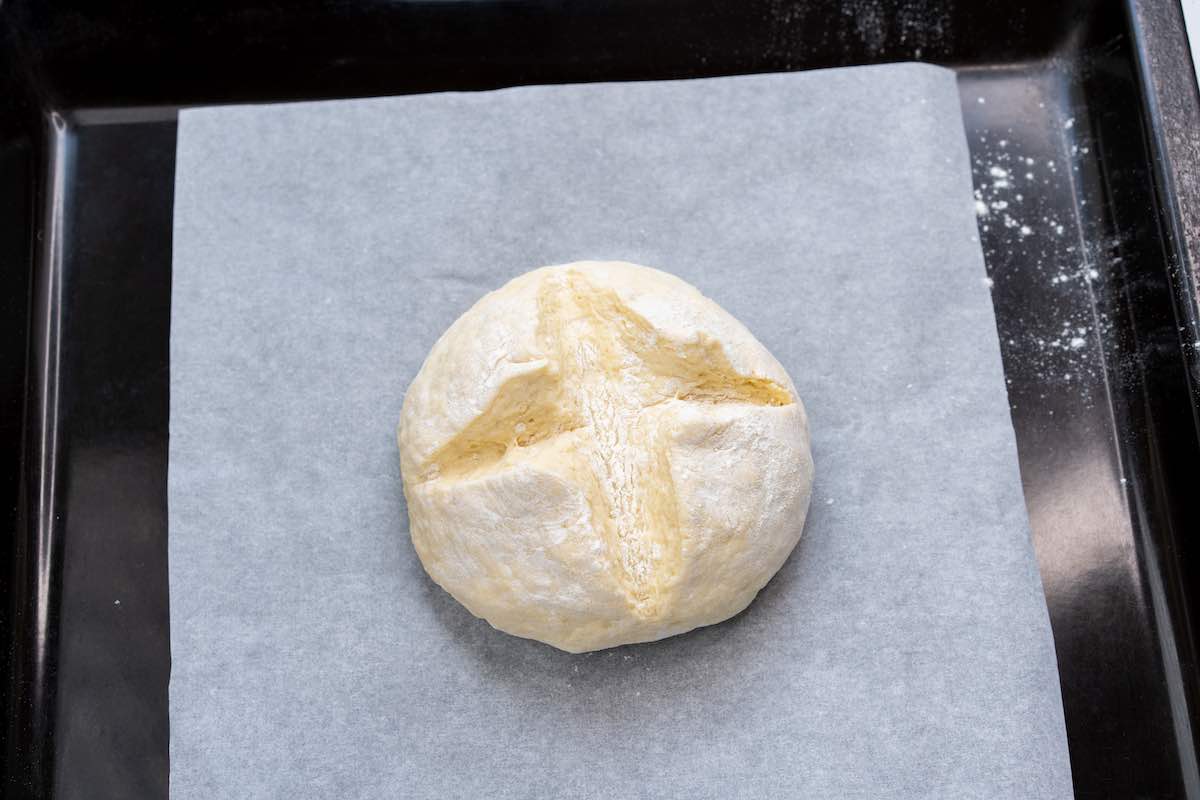
Step 5- Bake for 20–25 minutes, checking at the 20-minute mark. It’s ready when golden brown and sounds hollow when tapped.
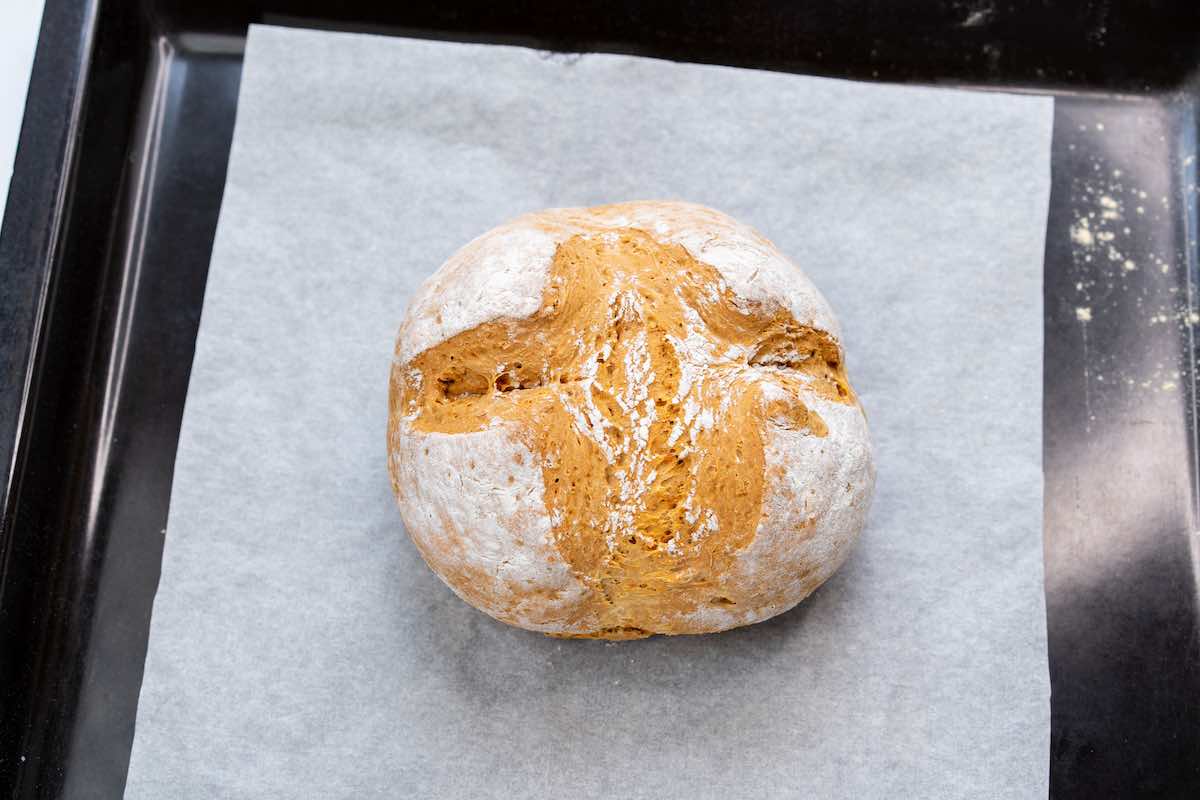
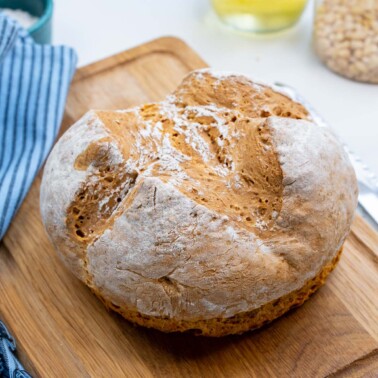
Step 6- Cool, slice, and serve. Remove from the oven and let it cool completely, then slice, toast, and serve.
Arman’s recipe tips
- Avoid overmixing the dough. My #1 tip for making homemade bread is to mix only until the ingredients are just combined. Otherwise, too much gluten will develop, and you’ll be left with a dense, chewy bread.
- Don’t over-knead either. Like mixing, you can accidentally knead out all the air in the bread, so only knead 8-10 times, max.
- Sift the dry ingredients. I’ll admit I don’t always adhere to this advice, but I know that sifting the flour makes for lighter, more airy bread.
- Slice with a serrated knife. I strongly recommend using a serrated bread knife to slice the bread since that will help break through the crust without smashing the bread as you slice.
- Use loaf pans. When I want a more traditional bread loaf shape, I’ll split the dough in half and bake it in two greased loaf pans.
Storage instructions
To store: Leftover bread can be kept in an airtight container at room temperature for up to 2-3 days. If you’d like it to stay fresher longer, store it in the fridge for up to 1 week.
To freeze: Place any leftover bread in a freezer-safe container and freeze for up to 6 months. Let the frozen bread thaw overnight at room temperature before toasting and enjoying.

Frequently asked questions
Adding baking powder to the batter, along with all-purpose flour, will help the bread rise similarly to if yeast had been added.
While you can use a bread machine, this recipe works best oven-baked.
Yes, you can. I’ve had success replacing the vinegar with fresh and bottled lemon juice.
More simple baking favorites
If you tried this Dairy Free Bread recipe or any other recipe on The Big Man’s World, please rate the recipe and let me know how it went in the comments below. It really helps others thinking of making the recipe.
Dairy Free Bread
Video
Ingredients
- 1 cup milk of choice I used oat milk
- 2 tablespoons white vinegar * See notes
- 2 cups all-purpose flour Use gluten-free, if needed
- 1/2 teaspoon baking soda
- 1/2 teaspoon salt
- 1 tablespoon sugar
Instructions
- Preheat the oven to 200C/400F. Line a large baking tray with parchment paper and set aside.
- In a small bowl, add the milk of choice with vinegar and let sit until it curdles, around 10 minutes.
- In a large mixing bowl, add the flour, salt, sugar, and baking soda and mix well. Using a 1/2 cup, add your curdled milk into it in two increments, and mix gently, until just combined.
- Lightly flour a kitchen surface. Sprinkle a tablespoon of flour on top of the dough and transfer to the floured surface. Gently knead the dough, around 8-10 times, and form a dome shape. The dough should still be quite sticky. Using a sharp knife, slice twice across the dough, forming a cross shape, around half an inch thick.
- Transfer the bread dough onto the lined tray. Bake for 20-25 minutes, checking around the 20 minute mark. The bread is cooked when golden brown on the tops and when tapped, makes a hollow sound from the base.
- Remove from the oven and allow to cool on the tray completely, before slicing and toasting.
Notes
- Oatmeal bread. Swap 2 tablespoons of flour with rolled oats, and sprinkle some oats on top before baking the bread.
- Raisin bread. Fold through ¼-½ cup of raisins into the dough. For a sweeter bread, add ¼ cup of sugar.
- Walnut currant bread. Fold through ¼ cup of chopped walnuts and ¼ cup of dried currants (or cranberries).
- Whole grain bread. Use whole wheat flour and add ¼ cup of mixed seeds into the dough, and sprinkle some on top before baking.
- Rosemary bread. Add 1 tablespoon of rosemary and ½ teaspoon of extra salt, and sprinkle coarse sea salt on top before baking.
Nutrition
Originally published April 2020, updated and republished April 2025


Hi. Thanks for this recipe. I have a question though. I’ve made this twice, with Bob’s Red Mill 1:1 Gluten Free Baking Flour. Both times, it comes out as just a white blob. It never browns. Are you sure it’s the 1:1 baking flour that should be used and not the Bob’s Red Mill All Purpose Baking Flour? The 1:1 is very different. I might try it with that the next time and will post another comment, but thought I’d check first.
Hi Nancy- It isn’t Bob’s Baking flour, but the all purpose flour- What is showing up for you?
Hi.. I made this.. turned quite delicious with a local GF flour blend.. I have 2 questions
1. Can I double/triple/quadruple the recipe?
2. Do you recommend making the dough in a food processor with dough attachment for a big batch?
Hi there! of course- I haven’t tried in a food processor, feel free to experiment and see!
I tried it and it was delicious but i had to add more flour because it was like a batter and I had to bake it for longer than 25 mintues…
Oven makes and models differ 🙂
Just re the vinegar: I have also successfully used lemon juice with both dairy & non-dairy milk to make buttermilk substitutes for recipes like this…works very well! FYI
Thx for this recipe, very similar to my usual soda-bread…looking forward to trying it out. (Rosemary-garlic is our current favorite variety)
Hi Jenn! Rosemary garlic is a fabulous combo- thanks for sharing 🙂
Maybe my mistakes and variations might help others :)…
I followed the ingredient measurements as written, used GF flour and ACV and no sugar (its what was in the cupboard). Also, had no parchment so just very lightly oiled the bottom of the baking sheet.
First attempt: the dough was very runny, had to add more flour to compensate. I think I over kneaded on this dough. First loaf came out very dense and dry and slightly undercooked.
Second attempt; dough was very runny. Added more flour (and oats this time) to compensate. definitely did not over knead. Baked for approximately 30 minutes in the end. Better result for sure. Constancy was bouncier and cooked evenly. Texture was a little powdery but I think this was the GF flour.
Will definitely continue to experiment, thanks.
how about cassava flour…..?? it will work…
No idea, I haven’t tried it
This bread is SO good! I’ve been making it for a while but the last time I only had a little GF flour left so I topped it up with oat flour. Next level bread….I’m addicted! Thanks for all your recipes – it’s so nice to have some baked goods back in my diet.
can I use apple cider vinegar instead of white vinegar?
I haven’t tried but I don’t see why not 🙂
I used almond milk.
How do I know when the milk curdled enough for the bread.
Do you have any video on making this bread.
Thank you 😊☺
It took me about 10 minutes. I don’t!
I used almond milk
How do I know when the milk curdle enough for the bread🍞
😊Thank you
It should take 10 minutes!
I made this and it turned out beautiful!!!! thank you so much!!! so easy too 🙂 looking forward to trying your other recipes.
Very good! I used lemon instead of vinegar and it worked great. I spread on a little coconut oil and blueberry preserves and it was wonderful! Will make it again. Thanks Arman!
Would Cassava Flour work for this recipe?
Nope, just the flour listed
I made the rosemary sea salt version and it was soooo good!! But small! Can I double the recipe??
Made this yesterday and it turned out great but is very small. Can you just double or triple the recipe to make a larger loaf?
Absolutely! I made it a small batch loaf so it can be enjoyed within a day or two, as it doesn’t taste great when kept longer. 🙂