Sticky Date Pudding
This post may contain affiliate links. See my disclosure policy.
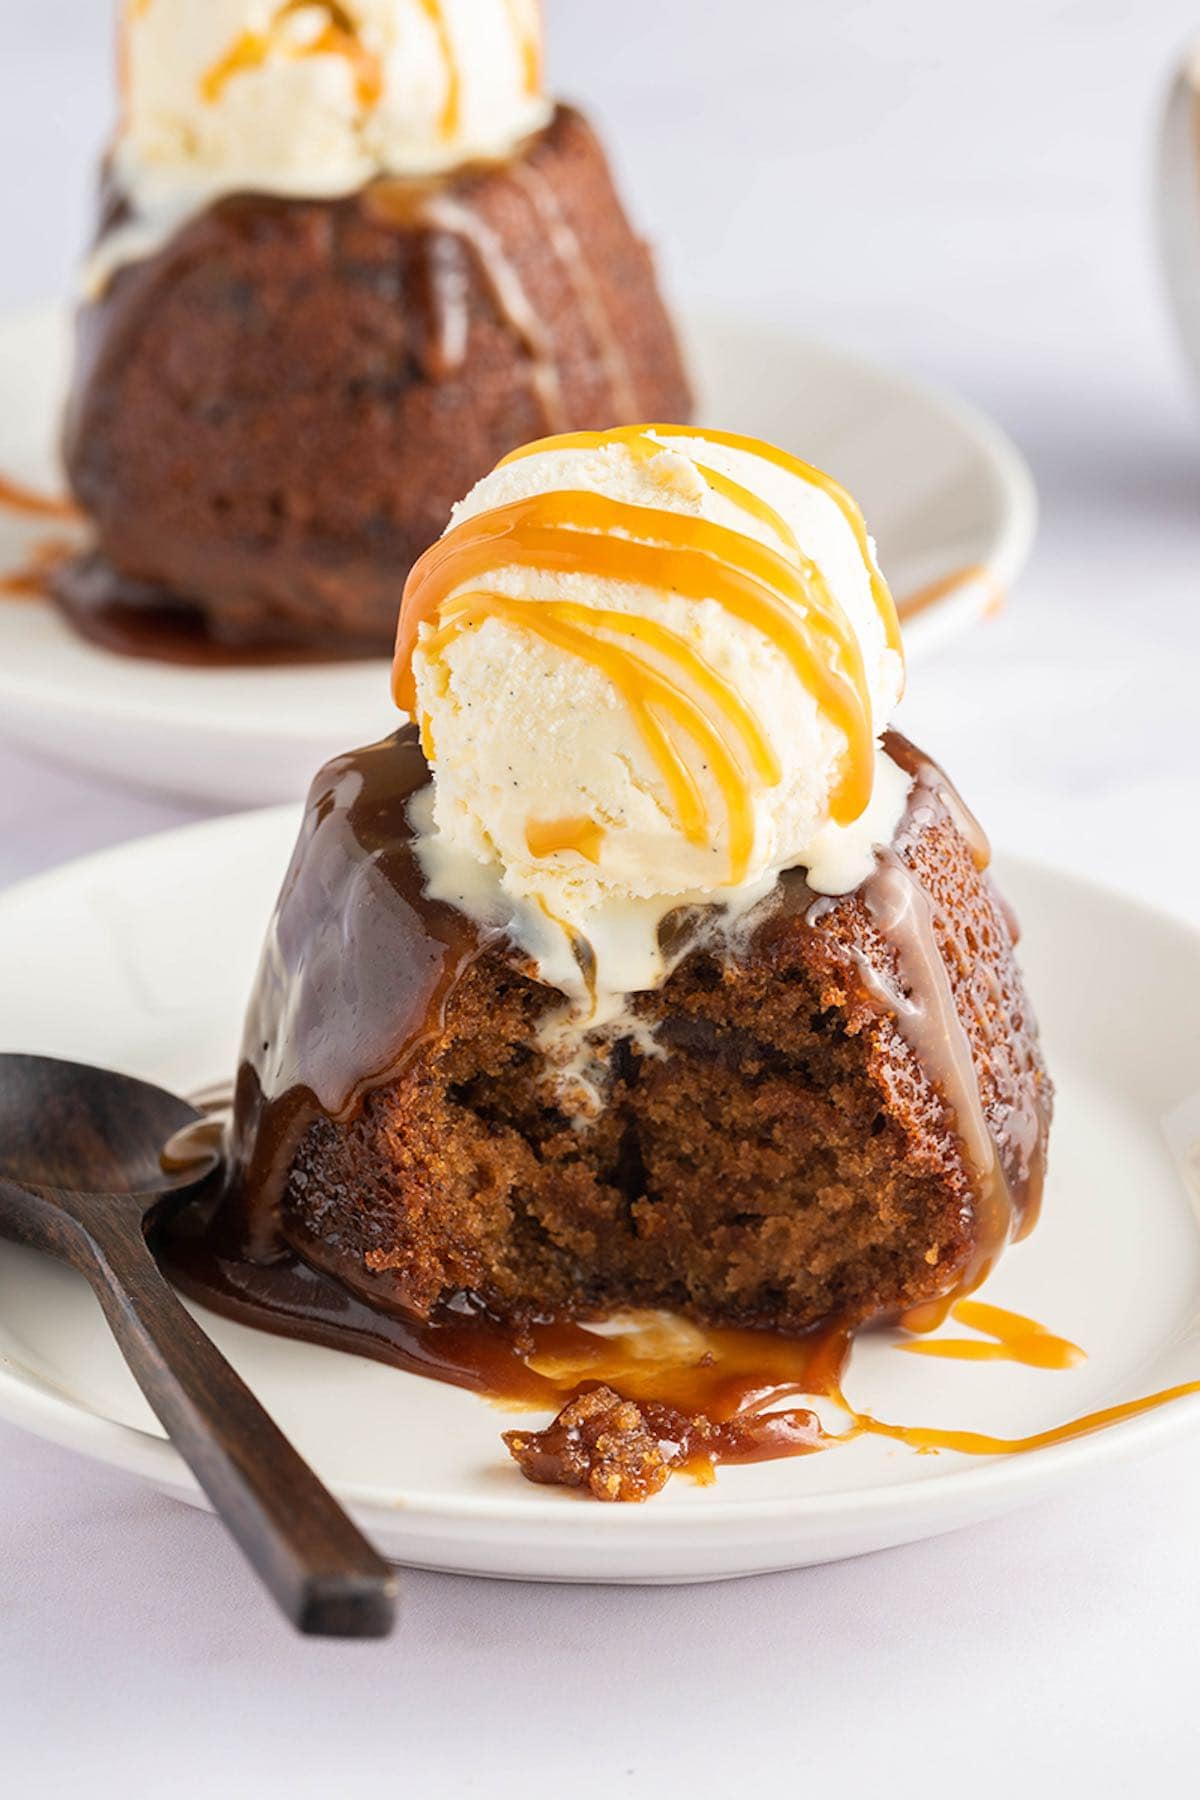
My sticky date pudding features a warm, date-sweetened sponge cake with the richest, creamiest caramel sauce. It’s egg-free and easy to make!
Without a doubt, one of the highlights of living in Australia is our love of toffee pudding.
Featuring a tender, delicate date-infused ‘spongecake’ oozing with warm toffee sauce, it’s easy enough to make on a random Tuesday yet fitting for your fanciest date night (no pun intended!).
What is sticky toffee pudding?
Toffee pudding, also known as sticky date pudding in Australia and New Zealand, is a British dessert made of a sponge cake of dates and sugar covered in a warm toffee sauce.
Table of Contents
Why I love this recipe
- Easy to make diet-friendly. With the simplest of substitutions, you can make this pudding vegan and or gluten-free.
- The PERFECT texture. The pudding is moist, with a tender crumb, and the caramel sauce seeps into every crevice to infuse each bite with flavor.
- Easier than you think. For how fancy it looks, it’s no different than baking a cake.
- Simple ingredients. Aside from the dates, the rest of the ingredients are straightforward pantry staples.

Ingredients needed
- Pitted dates. Essential for toffee pudding. I prefer the flavor and texture of Medjool dates. Don’t worry about soaking them, as they’ll be simmered beforehand.
- Milk and water. I used a combination of unsweetened almond milk and water so the pudding stays light and fluffy.
- Baking soda. Reacts with the flour to help the pudding rise.
- Unsalted butter. Use butter from a block, not a spread. Spreads tend to have added water which will affect the texture of the pudding.
- Dark brown sugar. Adds sweetness and a more intense toffee flavor.
- Self-rising flour. AKA all-purpose flour with baking powder and salt added. I made my own, but you can buy it pre-made if you prefer. If you want it to be gluten free, I’ve used the Dove Farm brand successfully.
For the sauce:
- Golden syrup. Golden syrup is a popular sweetener used in Australia and the United Kingdom. You can also use honey or corn syrup, or follow my homemade golden syrup recipe below.
- Brown sugar. For the toffee flavor.
- Unsalted butter. For the sauce.
How to make golden syrup
While I have successfully used honey instead of golden syrup, it has a unique flavor and texture that’s hard to replicate. Here’s how to make it at home:
In a saucepan, bring 1 1/4 cups of water and 2 cups of sugar to a boil, stirring often. Once boiling, add one tablespoon of lemon juice and reduce the heat to low. Let it simmer for 50 minutes (without touching) until it’s golden in color. Continue simmering until thick, then let it cool briefly before storing it in a jar.
How to make sticky date pudding
I’ve included step-by-step photos below to make this recipe easy to follow at home. For the full printable recipe instructions and ingredient quantities, scroll to the recipe card at the bottom of this post.
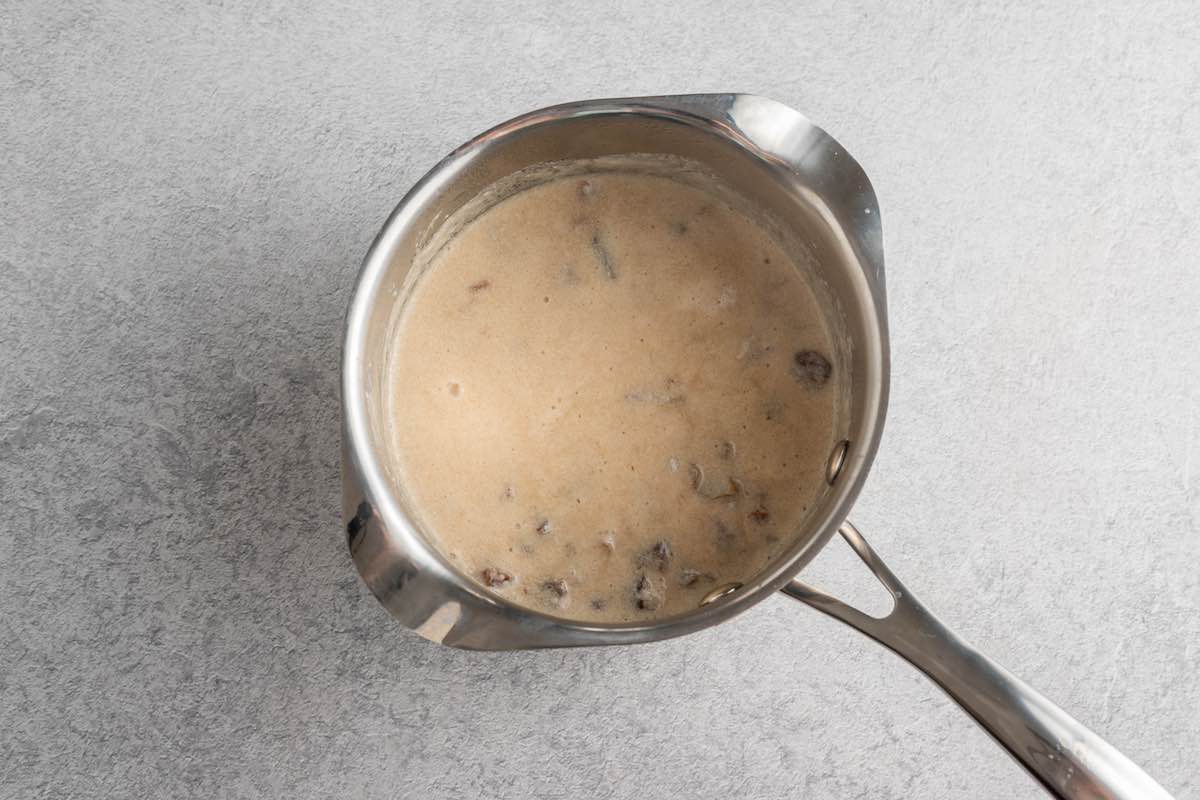
Step 1- Soften the dates. Add the dates, milk, and water to a saucepan over medium heat and simmer until the dates are softened. Remove from heat and stir in the baking soda.
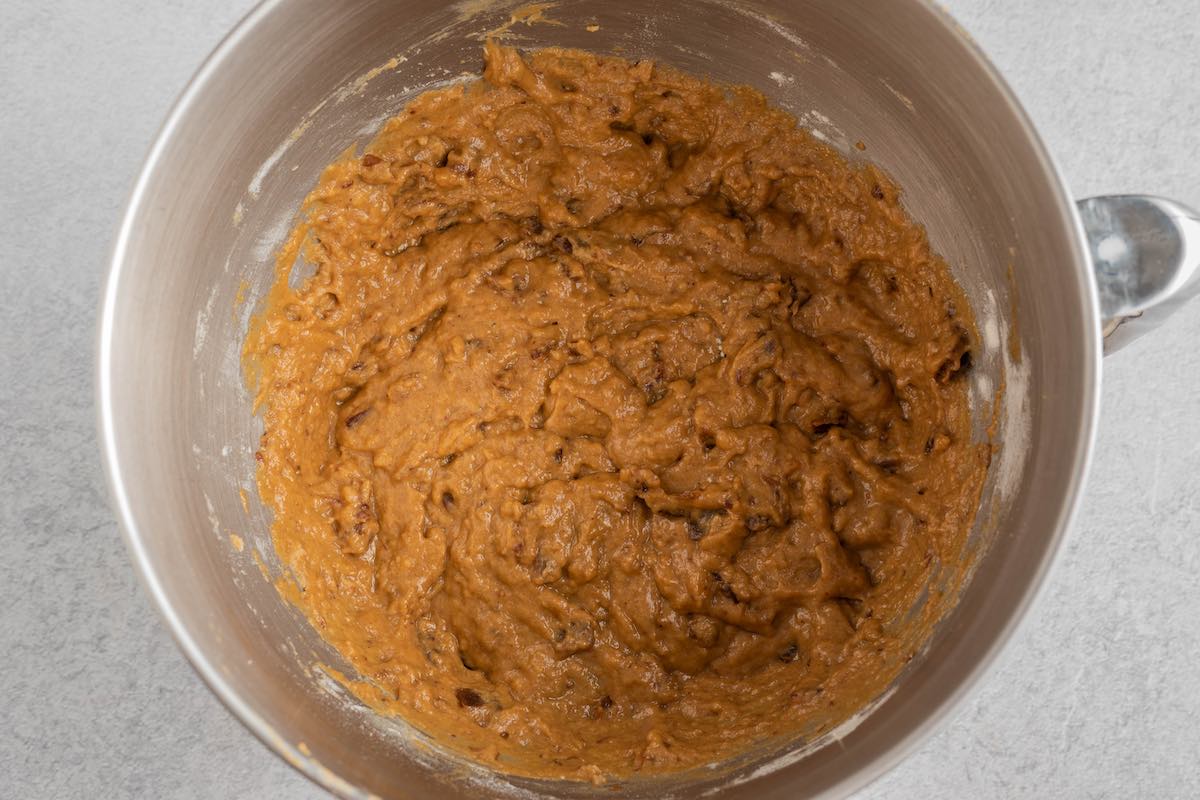
Step 2- Finish the pudding. In a large bowl with a hand mixer, beat the sugar and butter until creamy. Slowly fold in the date mixture, then gently add the flour until combined.
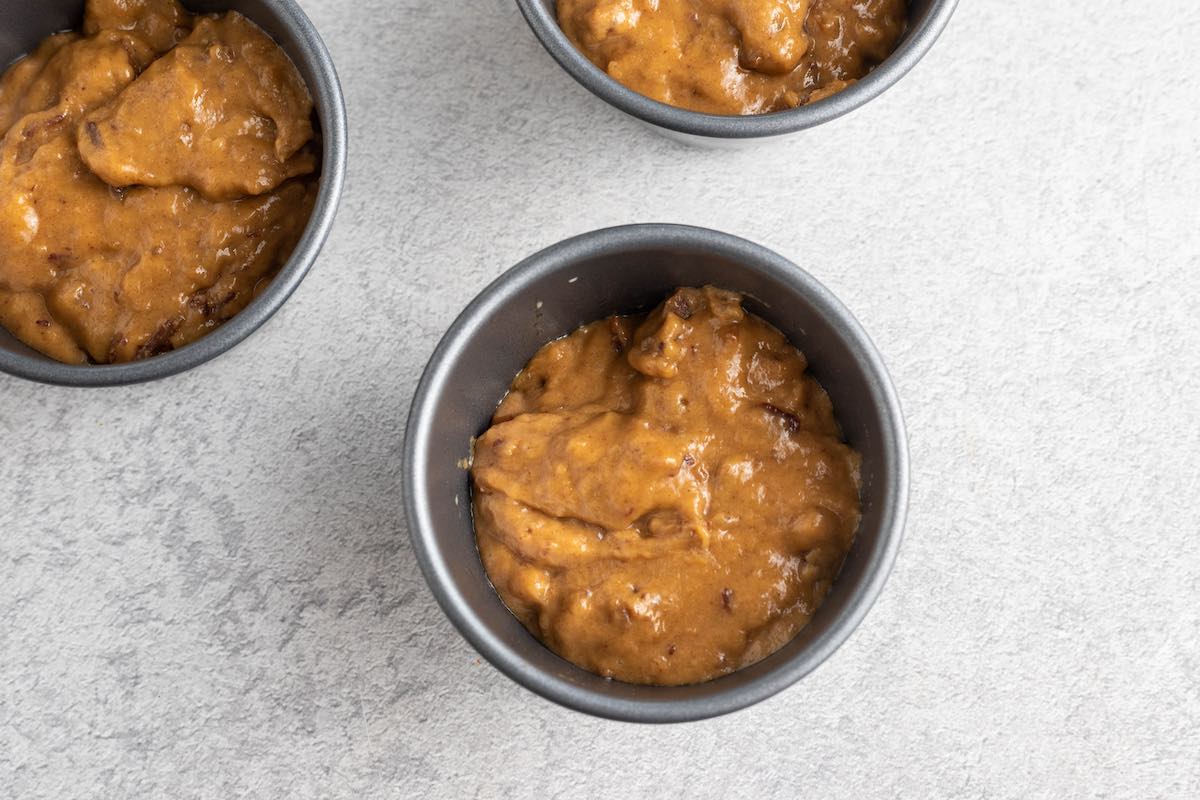
Step 3- Assemble. Pour the batter into the greased ramekins.

Step 4- Bake. Bake for 20-25 minutes, until just cooked and a toothpick comes out clean.
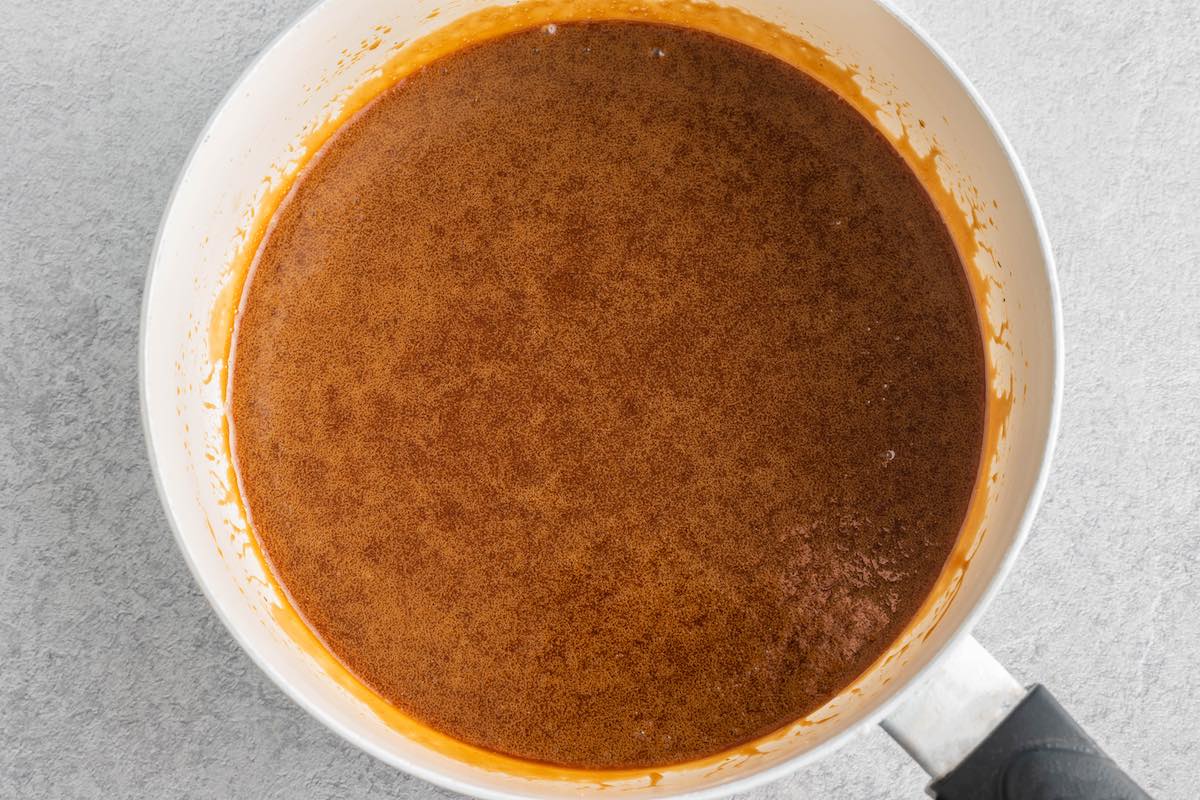
Step 5- Make the sauce. Add the syrup, sugar, and butter in a saucepan and simmer for 5 minutes.
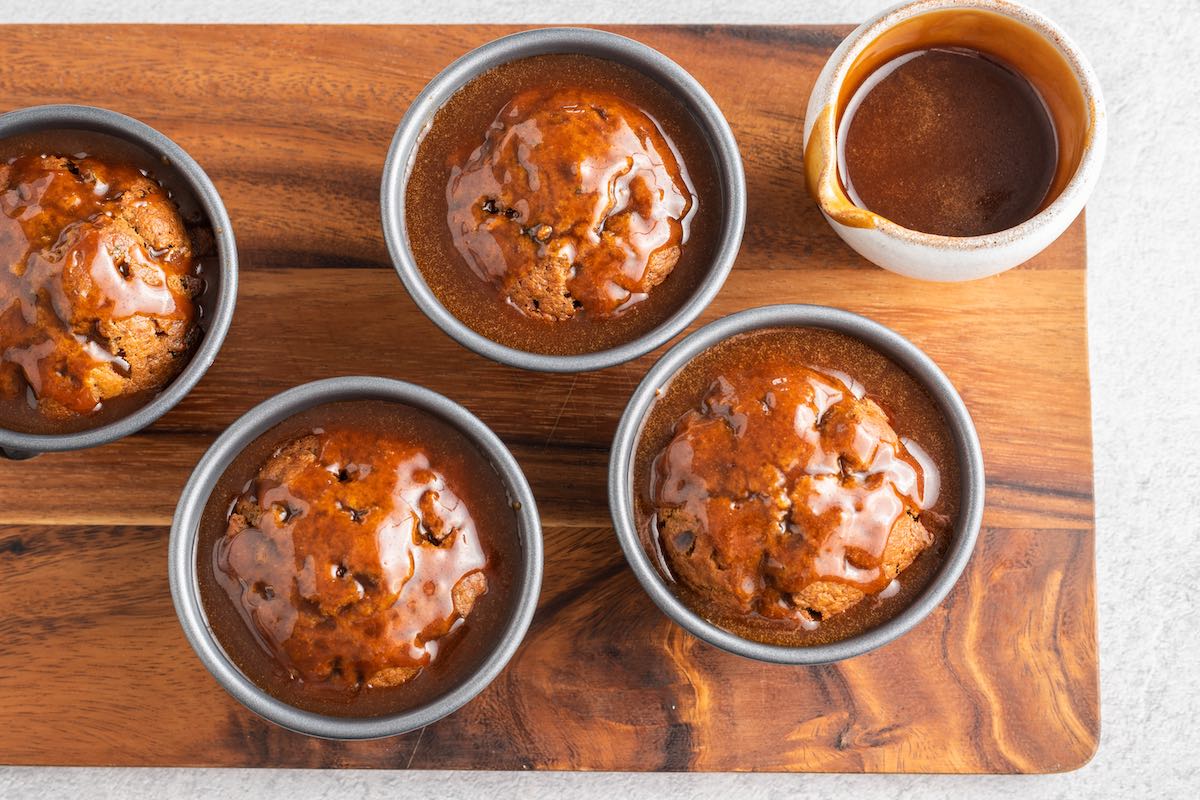
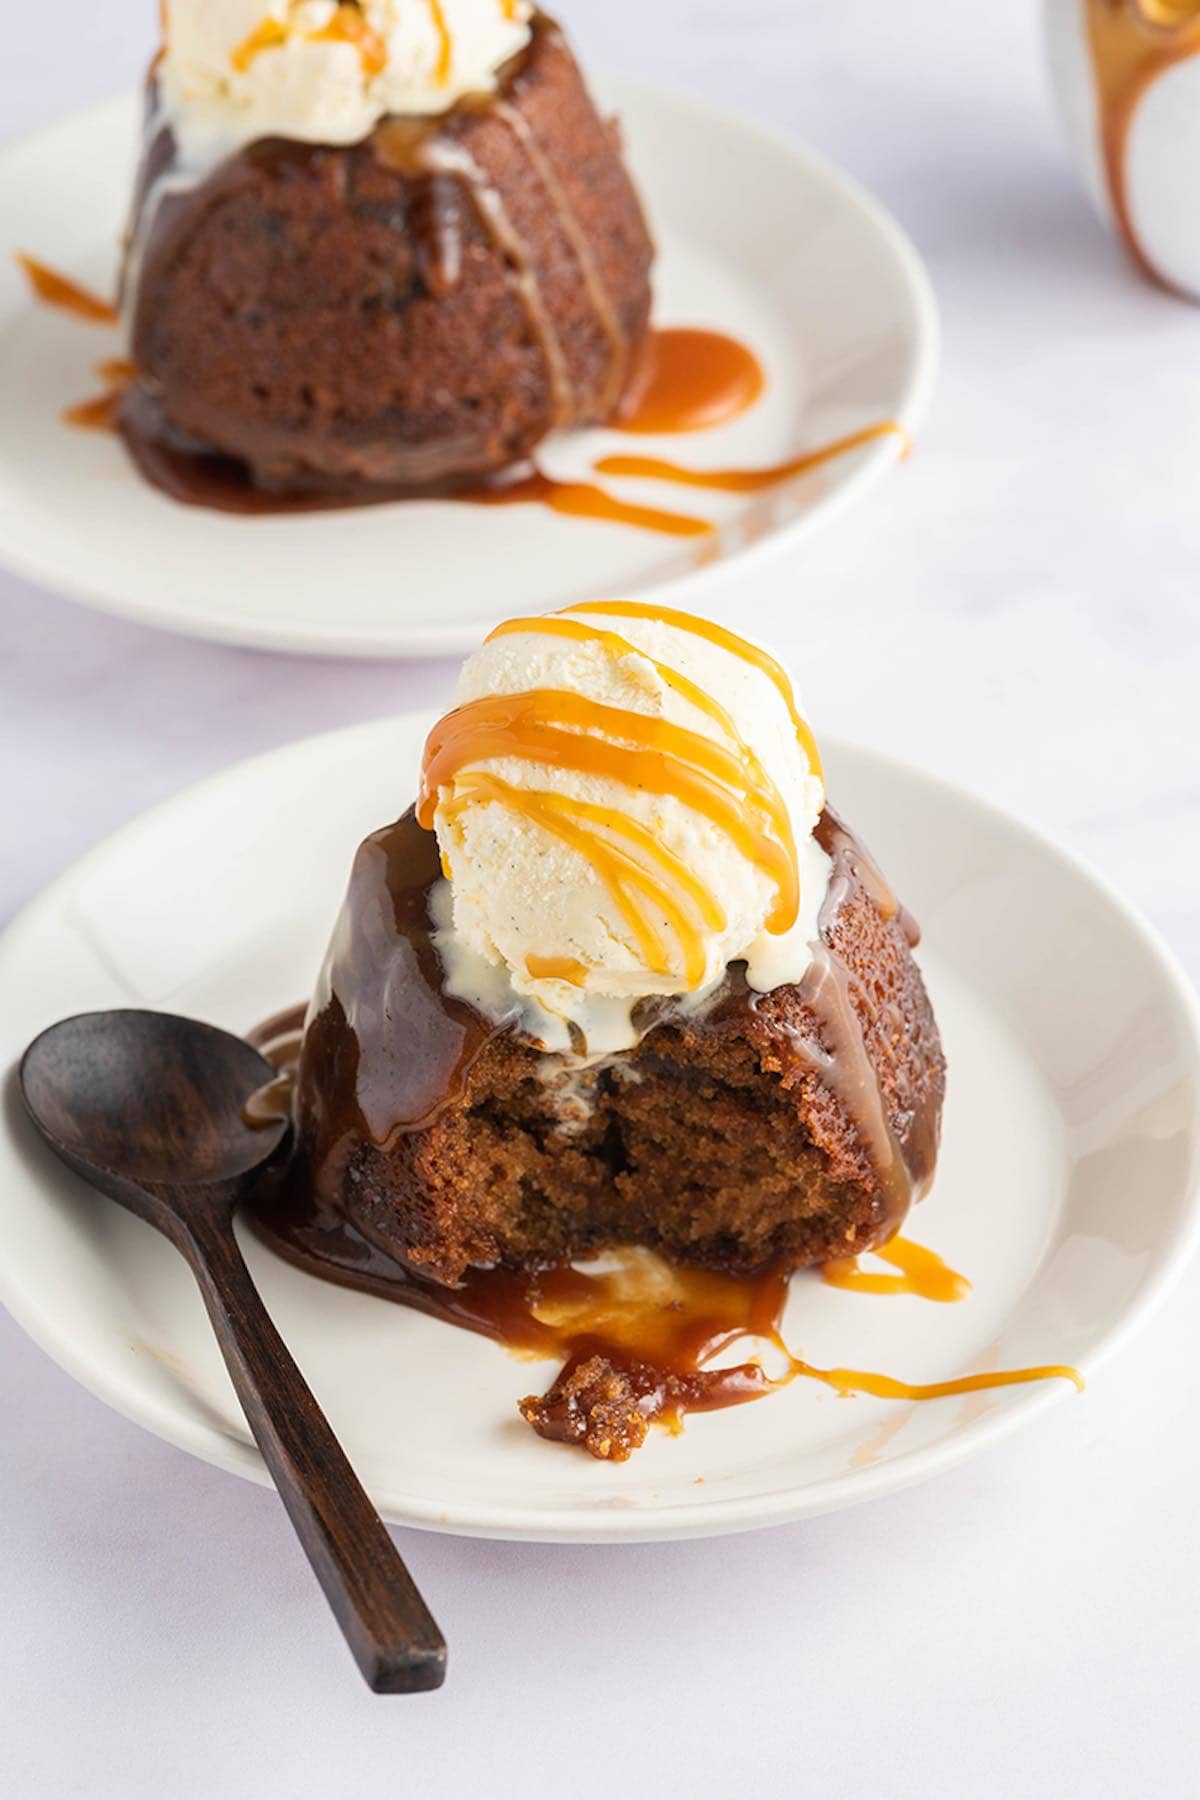
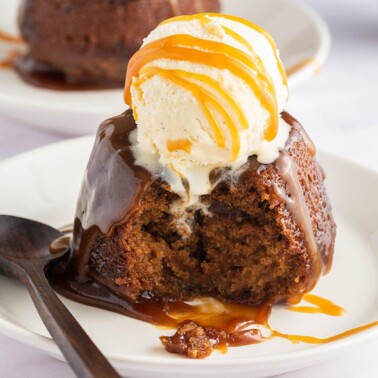
Step 6- Add the sauce. Poke holes over the tops of the puddings and pour half the sauce over each one to soak them. Flip the puddings on plates and pour extra sauce over each one.
Arman’s recipe tips
- Puree the dates. I like the texture difference you get from keeping the dates whole, but if want the pudding to be completely smooth, blend them in a blender or food processor before adding the dry ingredients.
- Use a different pan pan. To make one large toffee pudding, I recommend using a round 8-inch baking dish or bundt pan.
- Make them vegan. Use dairy-free milk and butter.
- Don’t overbake the puddings. The heat from the ramekins will cause them to continue to cook, so pull them from the oven as soon as a toothpick comes out with just a few moist crumbs.
Variations
- Add chocolate. Add 1-2 tablespoons of cocoa powder to give the pudding a richer, slightly bittersweet flavor.
- Or add spices. A pinch of cinnamon, nutmeg, cardamom, or even a teaspoon of vanilla extract can seriously enhance the flavor of this pudding.
- Sprinkle fine sea salt on top of the pudding to bring out the naturally sweet flavors.
- Serve with vanilla ice cream or a dollop of whipped cream for a truly decadent dessert.
Storage instructions
To store: Leftover pudding cups can be stored in the refrigerator, covered, for up to one week. Keep the remaining toffee sauce in a separate container.
To freeze: Wrap each sticky date pudding in plastic wrap and store them and the toffee sauce in separate freezer-friendly containers. Store in the freezer for up to six months.
To reheat: Microwave the pudding for 30 seconds, add the sauce, and microwave for another 30 seconds, or reheat the pudding in a preheated oven and warm the sauce in a saucepan.
Frequently asked questions
Yes! I’ve had success making toffee pudding up to two days in advance. To do this, prepare the pudding and the sauce, but make a double batch of the sauce. Cool the puddings, poke holes, and pour half the sauce on top. Cover and refrigerate until 30 minutes before serving.
When you’re ready to serve, reheat the puddings and remaining sauce, then pour the reheated sauce on top.
More delicious desserts to entertain
Sticky Date Pudding
Video
Ingredients
- 1 cup dates pitted & chopped
- 1 cup milk I used unsweetened almond milk
- 1/3 cup + 1 tablespoon water
- 1 teaspoon baking soda
- 1/2 cup butter
- 1/2 cup brown sugar
- 1 1/4 cups self-rising flour gluten free, if needed
For the toffee sauce
- 1/4 cup + 1 tablespoon golden syrup * See notes
- 1 1/4 cups brown sugar
- 2/3 cups vegan butter
Instructions
- Preheat the oven to 190C/375F. Grease 6 pudding molds or ramekins and set aside.
- Add the dates, milk, and water into a saucepan and simmer, until the dates are softened. Remove from heat and add the baking soda. Mix into the mixture and let cool.
- In a mixing bowl, beat the sugar and butter until smooth and creamy. Slowly add the date mixture and mix well. Gently add the flour until fully combined. Transfer the pudding mixture amongst the greased ramekins.
- Bake for 20-25 minutes, until just cooked and a skewer comes out clean.
- Prepare the sauce by adding the syrup, sugar, and butter in a saucepan and heating up and letting simmer, around 5 minutes.
- Poke holes over the tops of the puddings and pour half the sauce over each one, to soak the puddings. Flip the puddings on plates, pour extra sauce over each one. Serve with ice cream.
Notes
Nutrition
Originally published September 2020, updated and republished September 2024


this is literally the best sticky date pudding i’ve ever had! my dad is a sucker for dates and after he took the first bite he instantly told me to make 6 more.
I uae Bob’s Red Mill 1:1 all purpose flour for everything. Its not cheap but I can rely on it and can be subbed 1:1 for wheat flour.
Thanks for sharing that, Elayne. I do too, love either Bob’s Red Mill or King Arthur gluten-free flours 🙂
I use organic spelt flour. It is like wheat flour, but doesn’t cause grief and has little gluten.
I use it for everything.
Thanks for sharing, Mia. That is super helpful for others thinking of doing the same thing!
Hi What flour can I use instead of traditional gluten free flour. Can I use oat flour, buckwheat flour or Teff flour? What would work out of those please. And I can’t do regular flour or regular gluten free flour so need an alternative. Thanks
Hey Jas, oat flour can definitely work in this recipe if you don’t mind a little texture variation. I would sub it 1:1 and add a teaspoon of baking powder for some rise. Even 1/2 teaspoon of xanthan gum for some extra structure too, if you have some! If the batter is a little thick, you might need some extra moisture. Let us know how you go!
Love Ur recipes Thankyou
So welcome, Linda- I appreciate you making them!
Great recipe! Love a great GF recipe and sticky date is my fav dessert! Can I check how long should I reheat the pudding if I’m using an oven?
Hi Vivian! Thank you for your lovely feedback. Sure- If you’re reheating it in the oven, I recommend doing it at 300°F for about 5-6 minutes, or until warm on top (just press down with your finger and if it’s warm it’s done). Then just drizzle with the sticky sauce 🙂
Yum, it shows that you can still enjoy the best treats in life being a Vegan and Gluten free intolerant
Oh absolutely- this is one of the few OG date recipes before using dates became popular in no bake bars and granola bars!
Great recipe. Easy to follow and very yummy.
Hi there, is it possible to also bake this in one dish as a traybake pudding? Many thanks 🙂
Hi Claire- I can’t say I’ve tried that personally, so I can’t vouch for it. I have a chocolate pudding cake recipe that is like a traybake, but that is designed to be like that. If you try it out, let me know how it goes- you’d need to bake it a little longer!
How long should I bake it for if I make it in an 8 inch round tin, please?
Hey Bec, I would start checking on it around the 25 minute mark. You’ll likely only need another 5 minutes or so for a toothpick to come out clean.