No Bake Oatmeal Bars
This post may contain affiliate links. See my disclosure policy.
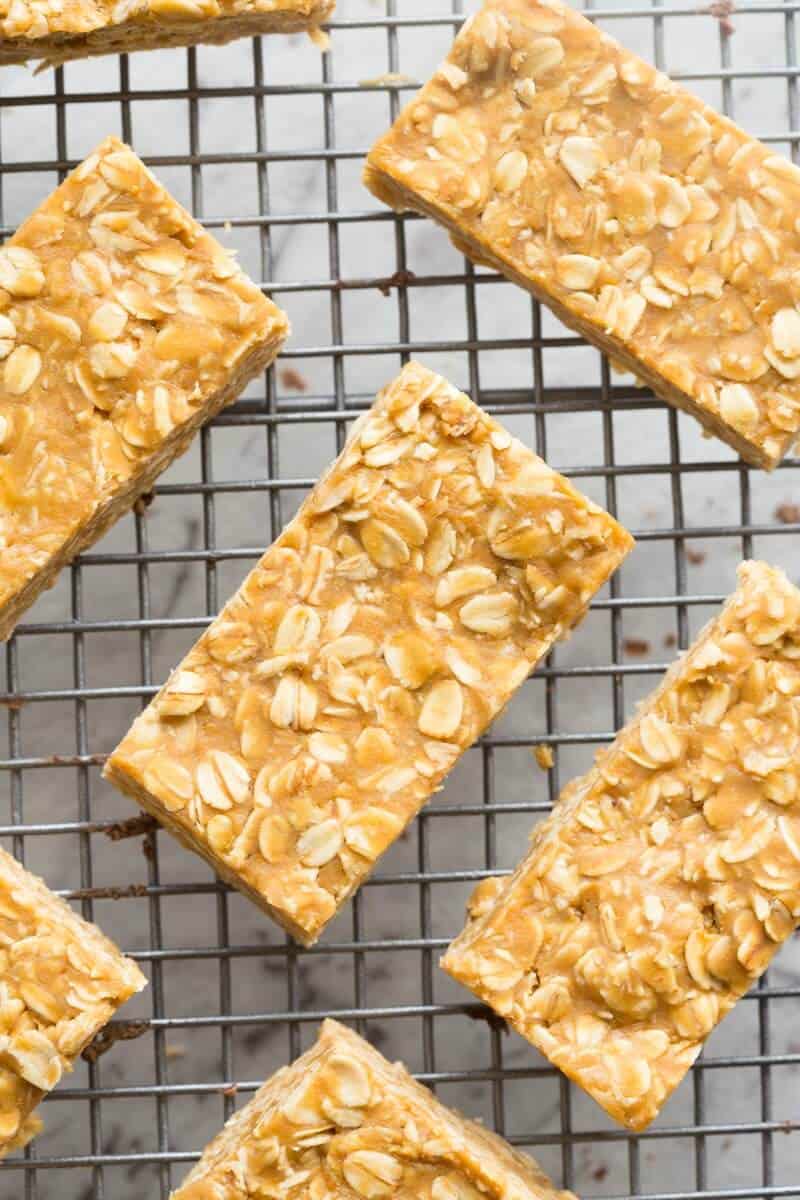
My no bake oatmeal bars are thick, soft, chewy, and made with just 3 ingredients. I love how customizable they are!
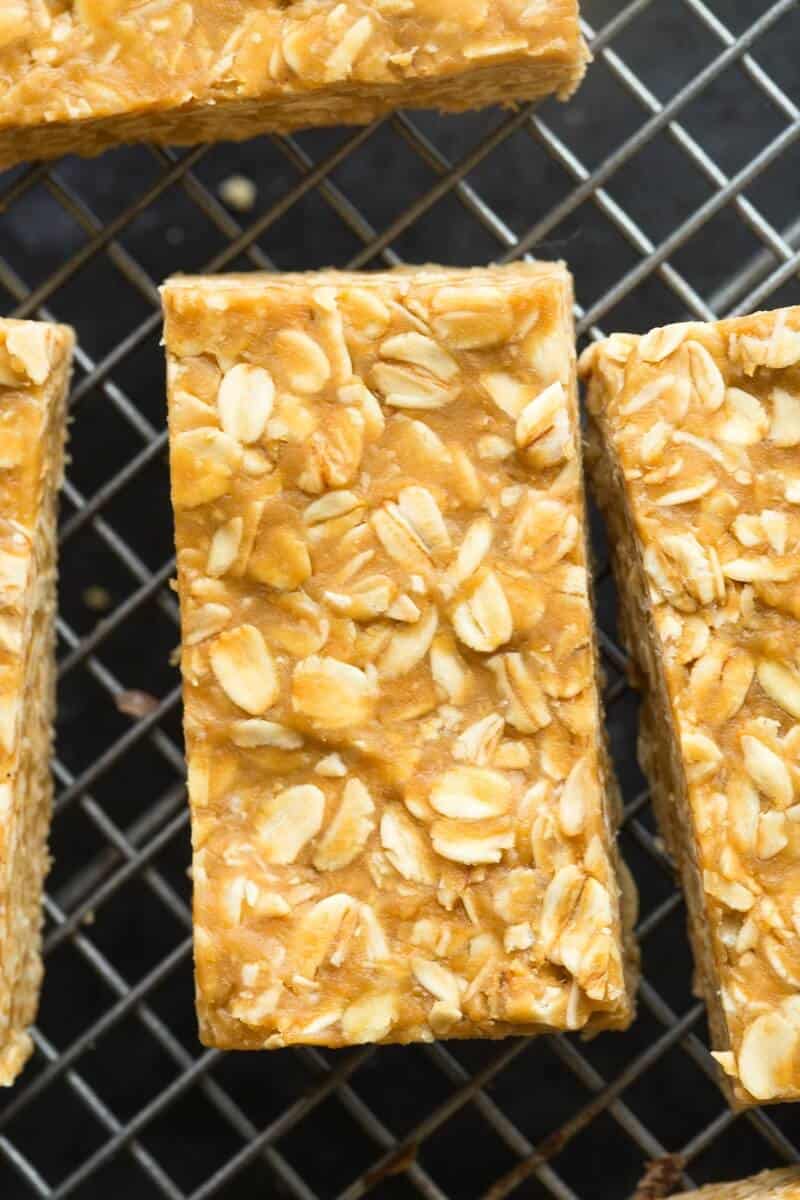
These no bake oatmeal bars were inspired by my healthy granola bars. They are even easier to make, and the results speak for themselves: soft, chewy, flavorful bars made to be enjoyed in minutes.
They are cost-effective and you know exactly what goes in them. Like homemade protein bars, these bars are perfect for breakfast, a midday snack, or a post-workout treat.
Table of Contents
Why I love this recipe
- Just 3 ingredients. Honestly, these could not be any easier!
- Easy to customize. Switch up the base ingredients or add an endless number of mix-ins. There’s no limit to how you can jazz up these bars.
- Quick and easy. These take less than five minutes to make.
★★★★★ REVIEW
“Awesome! So easy and prefer to make these as a snack for myself and my kids.” – Tony
Key Ingredients
- Rolled Oats. Old fashioned oats have the best chewy texrture. You can use quick-cooking oats (AKA instant oats) or oat bran, but I find that both lack the texture we want.
- Peanut Butter. Smooth and creamy peanut butter with no added sugar. If you don’t want to use peanut butter, any nut butter, like almond butter or cashew butter, will work.
- Maple Syrup. Gives the oatmeal bars sweetness and holds them all together.
How to make no bake oatmeal bars
This is an overview with step-by-step photos. Full ingredients & instructions are in the recipe card below.
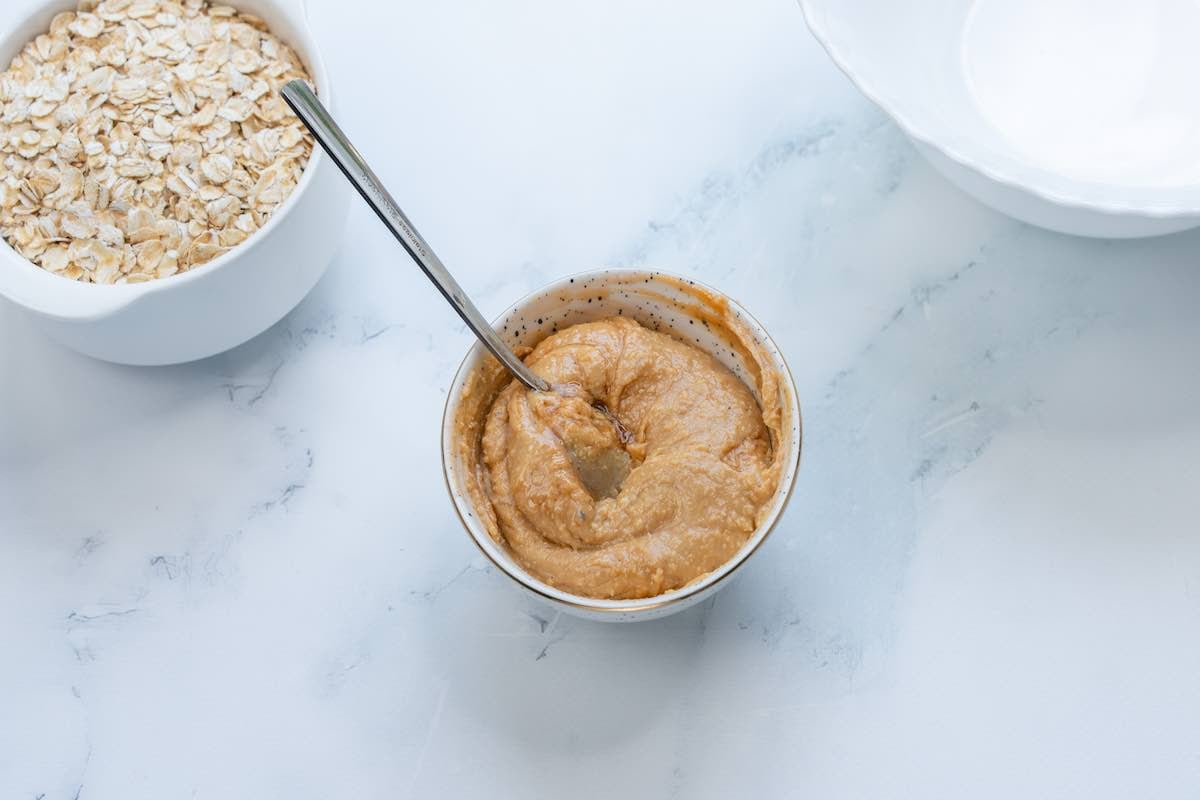
Step 1- In a microwave-safe bowl or saucepan over low heat, melt the peanut butter with syrup.
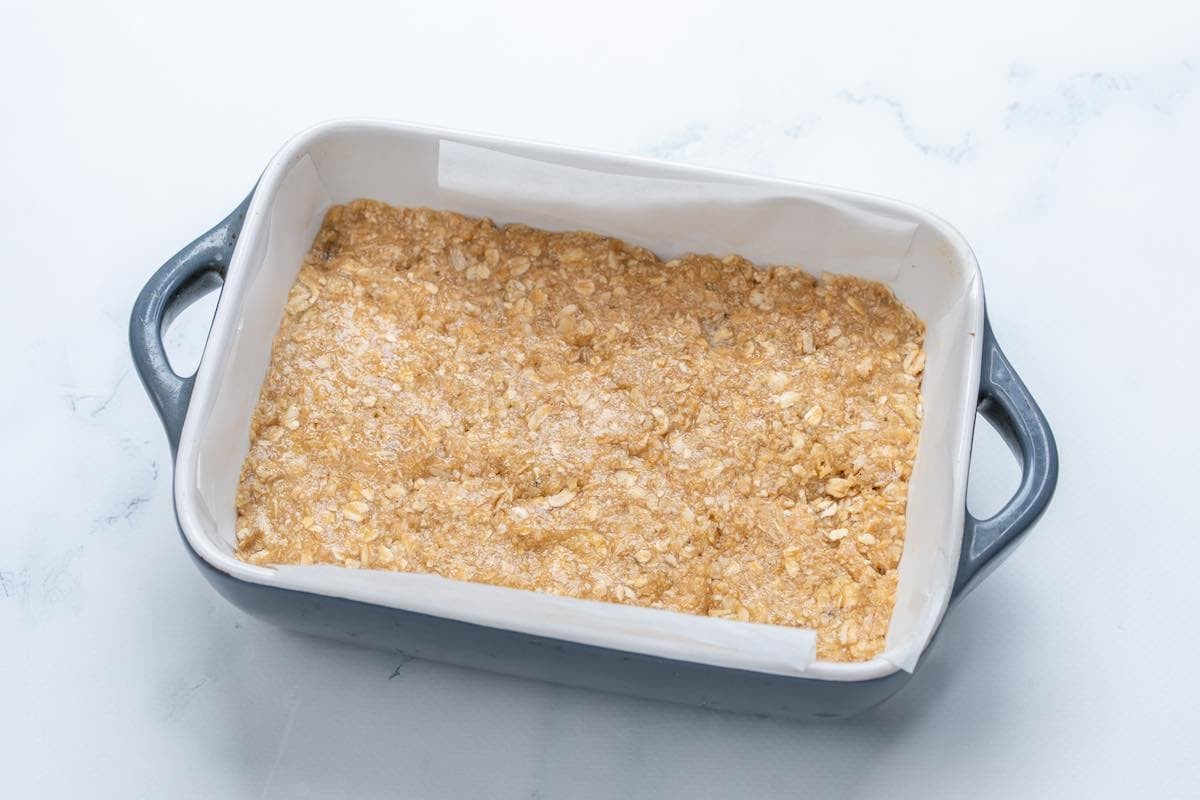
Step 2- Add the oats and stir until fully incorporated. Transfer to a pan and press firmly.
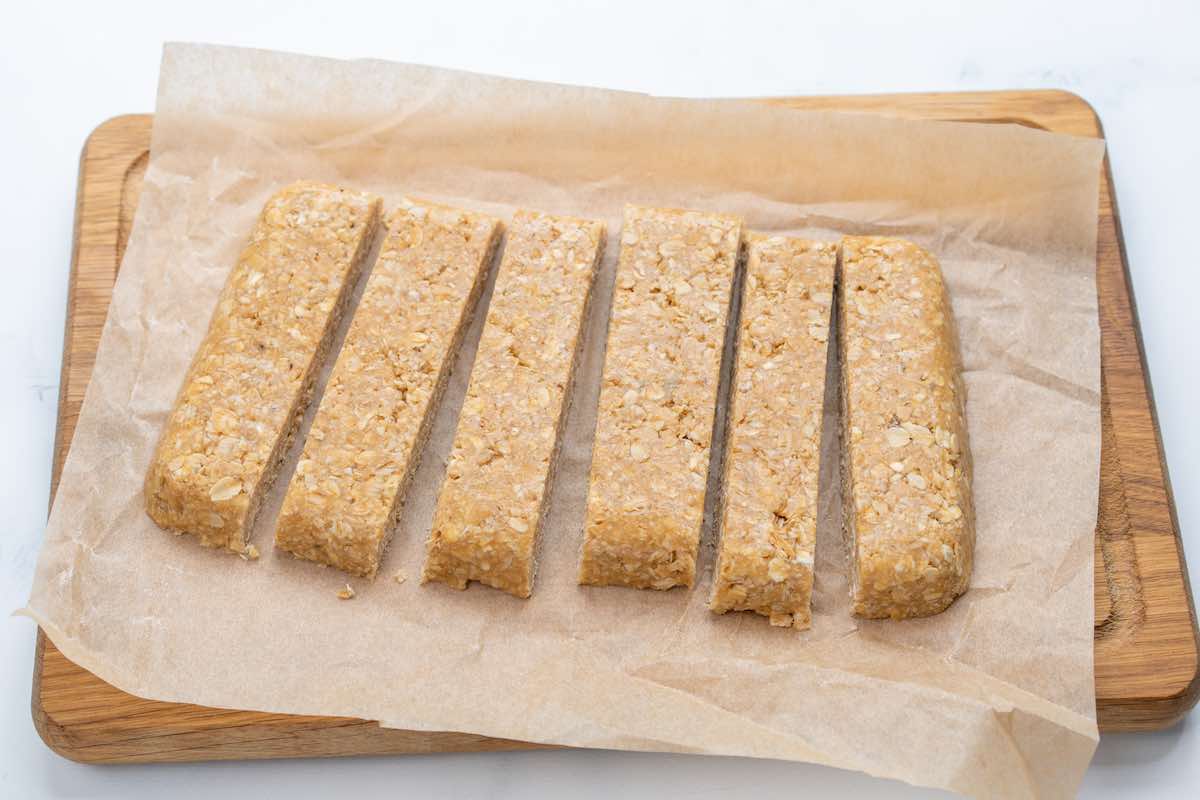
Step 3- Refrigerate for at least 30 minutes to firm up before slicing into bars.
Arman’s recipe tips
- Leave some parchment paper sticking out. So they’re easier to pop out of the baking dish when it’s time to slice.
- Melt the peanut butter and maple syrup together. This will guarantee a smooth, warm, and thin texture, making shaping the bars easier and much thicker and sturdier.
- Make them nut-free. To make these bars nut-free, swap the peanut butter for sunflower seed butter or tahini (or try nut-free granola bars).
- Adjust the consistency. Depending on the other ingredients, sometimes my bar mixture doesn’t develop the right consistency. If your bar mixture is super thick, add a splash of almond milk. If they’re thin, add 1-2 tablespoons of almond flour or coconut flour.
- Use a warm, sharp knife. To make cutting the bars more manageable, run the knife under hot water, dry it, then clean it between each slice.
Storage instructions
To store: Place leftover bars in a sealable container and keep them in the fridge at all times. They will remain fresh for at least two weeks.
To freeze: Chill your bars and then freeze them by placing them in a ziplock bag. They will keep well frozen for up to 6 months.
More healthy snacks
If you tried this No Bake Oatmeal Bars recipe or any other recipe on The Big Man’s World, please rate the recipe and let me know how it went in the comments below. It really helps others thinking of making the recipe.
3 Ingredient No Bake Oatmeal Bars
Video
Ingredients
- 3 cups rolled oats gluten-free, if necessary
- 1 cup peanut butter * See notes
- 1/2 cup maple syrup ** See notes
Instructions
- Line an 8 x 8-inch pan with parchment paper and set aside.
- In a microwave safe bowl or stovetop, melt the peanut butter with syrup until combined. Add the oats and mix well, until fully incorporated.
- Transfer the mixture into the lined pan and press into it firmly. Refrigerate for at least 30 minutes, to firm up, before slicing into bars.
Notes
- Drizzle with chocolate. Melt chocolate chips in a microwave-safe bowl, then drizzle them over the bars before letting them set in the fridge.
- Make a layered bar. Top the bars with a mixture of melted chocolate and peanut butter, then pour it over the oat mixture and let it set in the fridge.
- Add dried fruit. Like raisins, dried cranberries, or dried blueberries.
- Or experiment with different mix-ins. Like chopped-up chocolate, candy bars, M&Ms, or crushed cookies.
- Swap the nut butter. Try homemade Nutella, protein cookie butter, or Biscoff cookie spread.


Hey Arman,
I love that you use sunflower seed butter in this recipe! What a great idea and what a nice addition of flavor.
Linda
Thanks so much, Linda- If only they didn’t give the green tinge!
I was surrounded by so much peanut butter at school, that it’s kind of a miracle I made it through without dying. Could you imagine how horrible that would be? A world without The Spoon? 😛
It would be a calamity!
Hey these are perfect for me!
You betcha!
Thanks for this simple recipe Arman!
Your so welcome, Joanne! 🙂
Hey, question. Why do ALL your recipes ALWAYS look kick ass?!?!?! 😉
You’re a gem 🙂
OH MY GOD IS THE SUNFLOWER BUTTER?!?! The last recipe I made were sunflower butter chickpea blondies…and they turned GREEN in the oven! I thought it was the imitation vanilla I used X-) Why does it do that?! I need to research this! Thanks Arman!
Yes!!!!!!
Sunbutter is SUPER tasty. I don’t really buy it though, cause I don’t have much of a budget for it. However, next time I do I will try this. YAYAYAY!!!!
I make my own, Emily- It’s way more cost effective 🙂
Agreed! Make your own. That way you can also flavor it however you’d like… add cinnamon, yum!
YES! Cinnamon would be a great addition!
Lots of allergies! Which is why I love that schools are actually making cafeterias safe for kids with them. These bars look amazing– sun butter is my fav!
That’s so true, Michelle- Thanks so much- It’s so good…especially salty 😉
You’ve got some serious geometry skills, as in those bars are so perfectly shaped! And the look delicious.
Thanks so much, Jess!
I always have these ingredients on hand so it would def be so easy to make these in my college apartment! I agree that food allergies have grown a big deal in the last decade, in elementary school my bff was allergic to peanuts and there was a serrate lunch table for those kids who were allergic to peanuts, now there are so many more allergies wheat, dairy, eggs and things you would never think people would be allergic too!
Oh wow- I have heard about the separate lunch table shenanigans. I swear with all these new foods, more allergies become prevalent!
It’s ‘funny’ how almost all bloggers overseas seem to know the banning of certain foods for allergy reasons. That was never an issue around here. Nonetheless, I’m sure the simplicity and low cost of these bars has the potential of convincing many parents to prepare their own bars instead of going for sugar-laden storebought ones.
Things change in society and lifestyle influences have this impact. My friend in Hamburg says there are allergy issues at her workplace 🙂
It seriously scares me how prevalent food allergies are in schools these days! I worked at a day care for over a year and seriously would go around pouring 10 different kinds of nut milks, soy milk, 2% etc. then go down the line of who is gluten free, who is pork free, who has to be put on a lockdown from nuts (can you imagine if i was allergic to nuts =l) It also frightens me that people think it could be the GMOs/artificial things that are leading to allergies and disorders like autism and AHHH WHAT IS THE WORLD..
but before it gets too eternally depressing, let me just say how much i love sunflower butter, even though it is a heinous color of poopy brown. These look delicious though, even if i am “green” with envy 😉
WHAT? that is insane how things have changed! I swear life was so much less complicated as a kid.
No allergies for me, however I actually do love sun butter! Love how simple yet tasty this recipe is, perfect for anyone :)!
Thanks so much, Niki 🙂