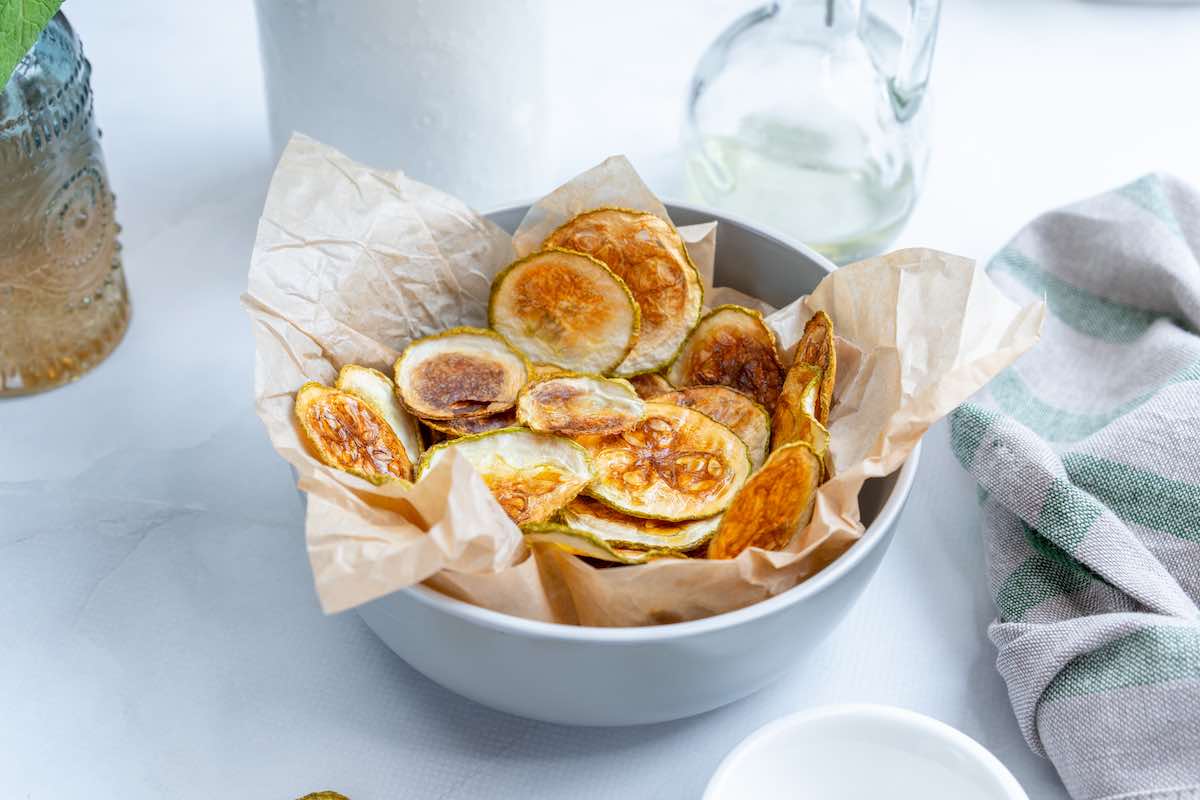
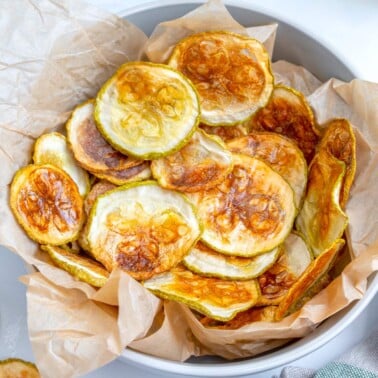
Baked Zucchini Chips
This post may contain affiliate links. See my disclosure policy.
My healthy baked zucchini chips are crispy and crunchy, requiring barely any preparation. They need just three ingredients and are so easy to customize. Oven and air fryer options.
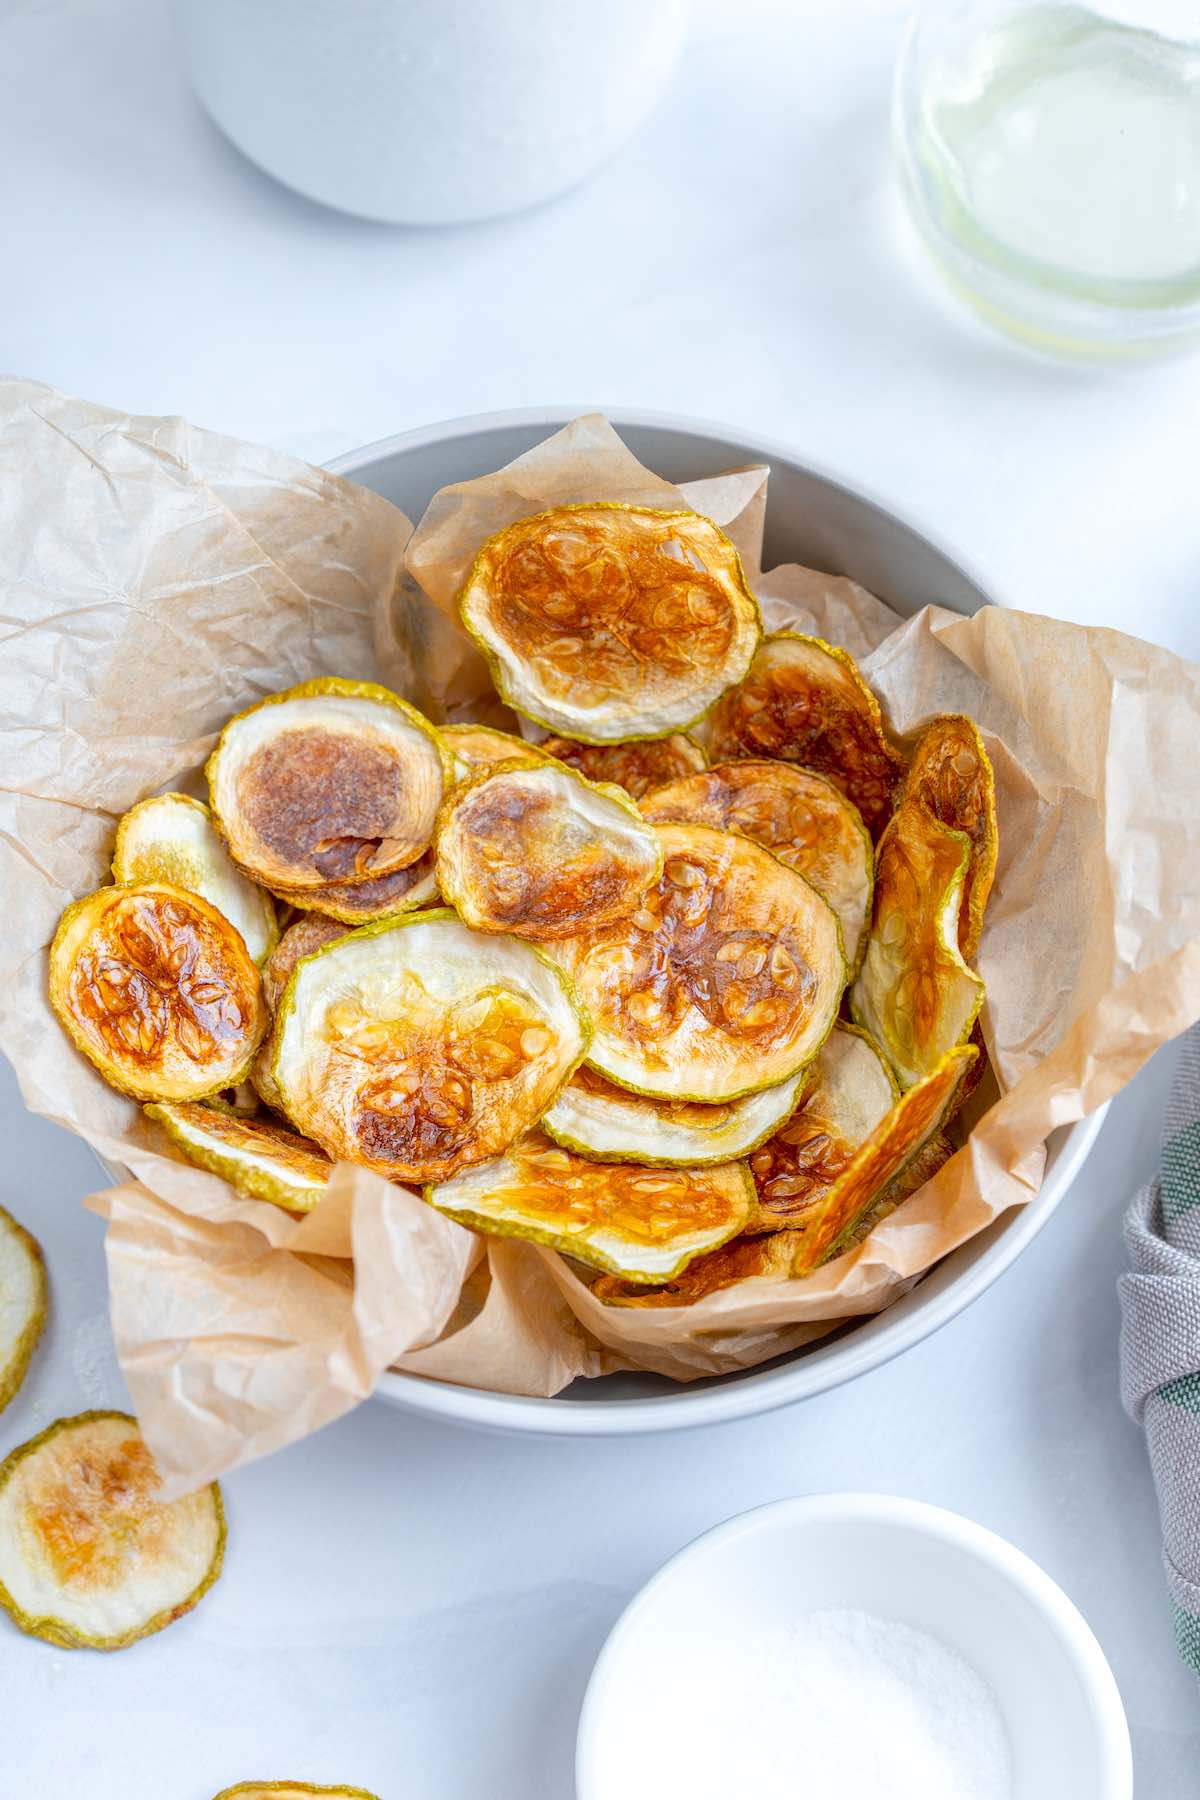
Zucchini crisps are my ultimate guilt-free hack for satisfying my potato chip craving. While my partner adores my zucchini fries, making them as chips is just so much more fun to eat.
They are healthy and need just a touch of oil. They are crispy and light, with a satisfying crunch. I love them on their own, but my partner pairs them with spicy mayo or ranch.
The trick to crispy zucchini chips is to slice them thinly and gently grease them. Doing this ensures the zucchini crisps up rather than steams, without soggy middles.
Table of Contents
Why I love this recipe
- Healthier than packaged chips. These are low in calories and carbs, and packed with fiber.
- Versatile. I prefer to eat my veggie chips straight out of the bowl, but if you’d like, they work equally well as an appetizer or crushed on top of a Mediterranean bowl.
- Customizable. I’ll provide you with the base recipe and a few flavor combinations.
- Great for meal prep. I like to make these chips on Sunday and then store them for the rest of the week. They pack great, and even my sister’s kiddos will look forward to having them in their school lunches.
★★★★★ REVIEW
“We love these zucchini chips as a guilt-free snack or alternative to potatoes. The zucchini turned out SO crispy and not soggy.” – DC
Key Ingredients
Here’s what goes into baked zucchini chips, along with my kitchen notes. Full measurements are in the recipe card below.
- Zucchini. The thinner you slice the zucchini, the crispier your chips will be. Look for large zucchini with no soft spots or browning.
- Olive oil. I like the subtle flavor of olive oil spray, but any good quality oil can be used.
- Salt. Just a dash to add flavor.
How to make zucchini chips
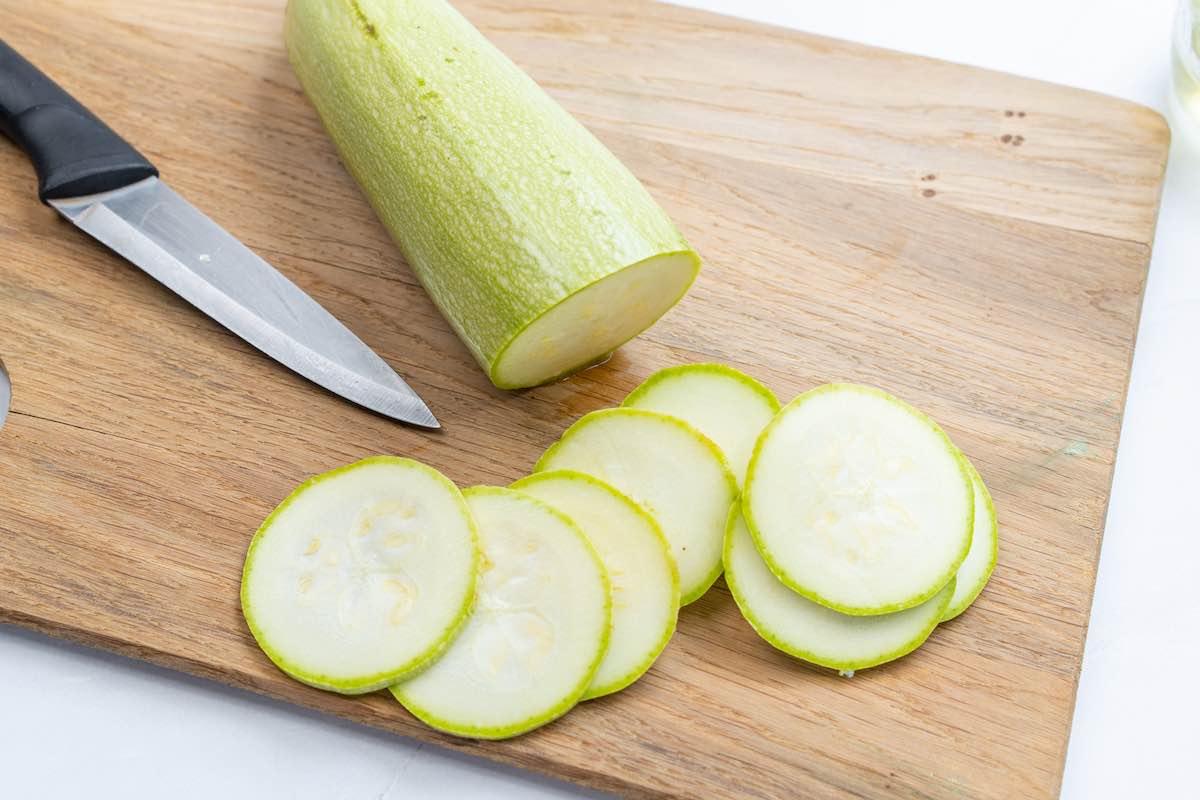
Step 1- Prep. Slice the zucchini very thinly.
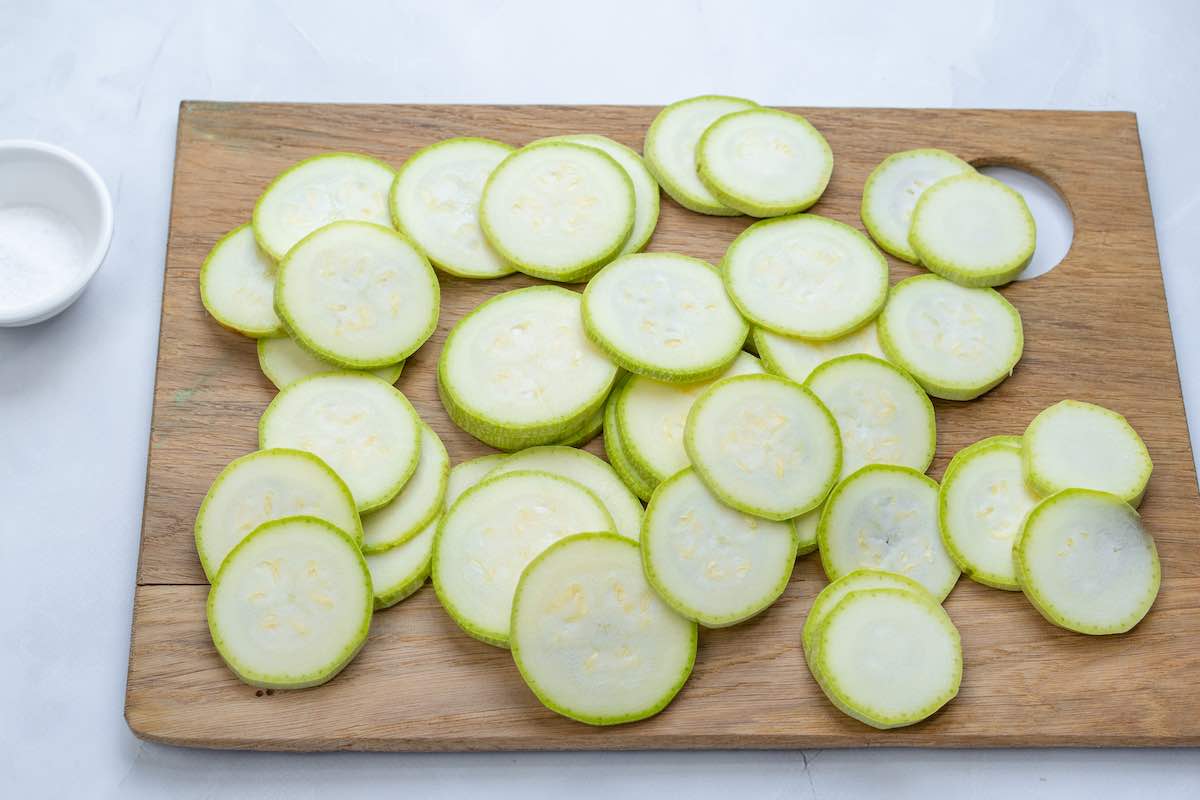
Step 2- Drain. Using a paper towel or a clean kitchen towel, pat the zucchini dry to remove all excess moisture.
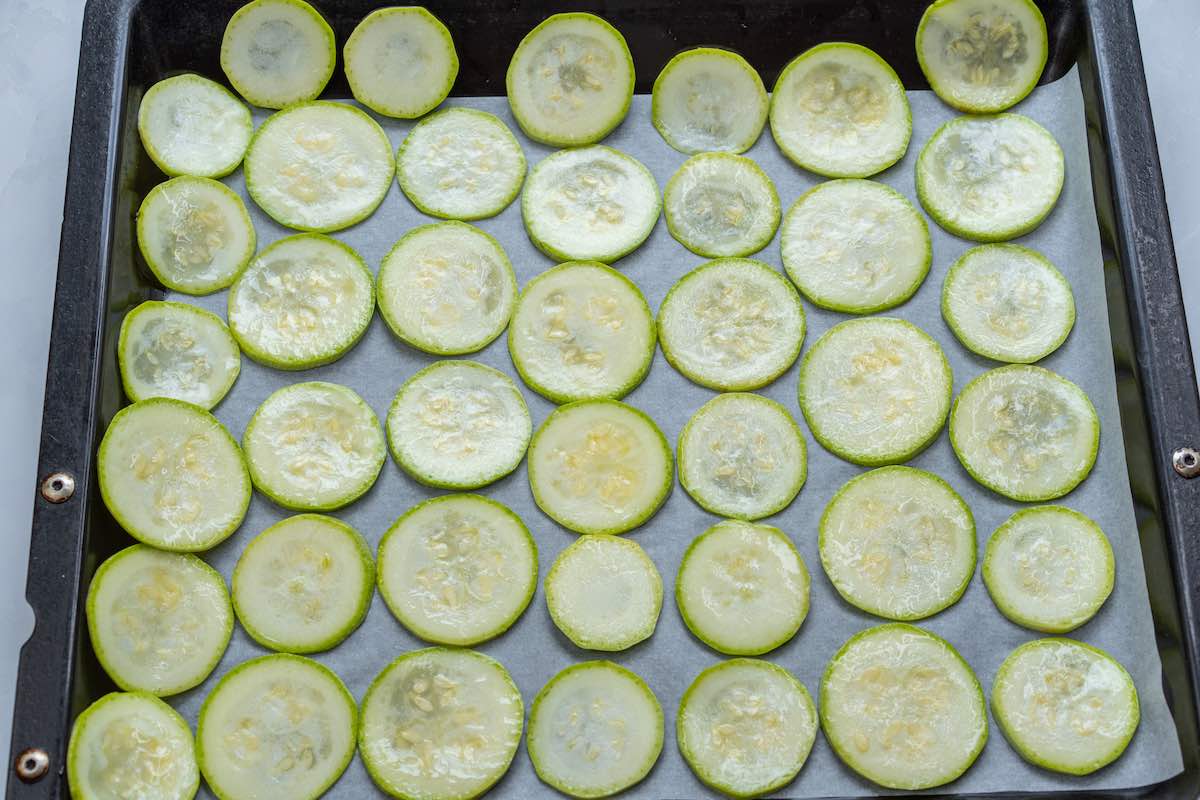
Step 3- Season. Add the olive oil and salt, and toss until the zucchini is lightly coated. Place the zucchini on the prepared baking sheet in a single layer.
Step 4- Bake for 30 minutes or until crispy and golden brown. If they’re still flat and pale, bake for another 10 minutes. The chips will feel slightly soft straight from the oven- don’t panic. They firm up completely once they cool.
Arman’s recipe tips
- Don’t add extra salt. Adding extra salt will draw out too much liquid and soften the chips, so hold off until they’re cooked and cooled.
- Get all the excess moisture. If there’s any moisture left in the zucchini, they won’t get crispy, so make sure to use plenty of paper towels to soak it all up.
- Check often. Everyone’s oven works differently, so if your oven runs hot, check your chips after 30 minutes and every 10 minutes thereafter to prevent them from burning.
- Use other types of squash. When I don’t have enough zucchini for this recipe, I’ll substitute yellow squash.
- Use a mandolin slicer. While this is certainly optional, I find using a mandolin is a great way to get perfectly even, thin slices.
Flavor variations
Barbeque. Add a mix of BBQ spice and smoked paprika. This is my partner’s favorite.
Ranch. Add ½ tablespoon of ranch seasoning and ½ tablespoon of garlic powder.
Spicy. Mix ½ tablespoon of cayenne pepper and ½ teaspoon of red pepper flakes.
Cheesy. Sprinkle finely grated parmesan cheese (or nutritional yeast) just before baking the chips. They crisp up even more.
Salt and vinegar. Remove the chips from the oven midway through and spritz with white vinegar (adding it too early will cause steaming).
Storage instructions
To store: Store extra chips in an airtight container at room temperature for up to 2 weeks.
To freeze: Transfer the chips to a freezer-safe container and freeze for up to 3 months. Make sure the bag is completely sealed, or moisture will seep in, and the chips will become soft and mushy.
To reheat: To reheat frozen chips, pop them in an air fryer at 200°F for 4-5 minutes or in a preheated oven at 250°F for 7-8 minutes or until warm.

Frequently asked questions
Your zucchini chips may be soggy if they were cut too thick, not enough moisture was removed, or too much seasoning was added. The best way to achieve perfectly crisp chips is to cut them using a mandolin, if possible, and add only ½ teaspoon of salt to the zucchini before baking.
I don’t recommend breading the zucchini since they would have to be dipped in liquid for the breading to adhere, which would make them soggy and not crisp at all.
Crispy Baked Zucchini Chips
Video
Ingredients
- 2 large zucchini
- 1 tablespoon olive oil or any good quality oil
- 1/2 teaspoon salt * See notes
Instructions
- Preheat the oven to 200C/400F. Line a large baking sheet with parchment paper.
- Slice the zucchini into very thin slices. Using a paper towel or dish towel, pat the zucchini dry to ensure all moisture is removed.
- Transfer the zucchini into a large mixing bowl. Add the olive oil and salt and mix well, until the zucchini is lightly oiled.
- Place the zucchini on the lined sheet in a single layer. Bake for 30 minutes, or until crispy, curled around the edges, and golden brown. Remove from the oven and allow to cool completely.
Notes
Nutrition
More homemade chip recipes
- Veggie chips– I developed this recipe after spending a fortune on packaged veggie chips.
- Parmesan crisps– Mounds of Parmesan bake up into crispy, cheesy deliciousness.
- Cottage cheese chips– Who knew chips could pack in this much protein?
- Shrimp chips– Say goodbye to takeout and make it yourself.


When I make eggplant parmesan I alway salt each slice for a while first. This helps take a lot of the moisture out so the eggplant won’t be soggy.
Would this help with this recipe?
Hi Rae-you can, but it’s not necessary. As long as you soak up as much of the liquid as possible, you’ll be fine 🙂